Showing posts with label recommendations. Show all posts

Sunday, August 21, 2011

Tutorial Review: Ruffle Tote

I've been reading a new blog the past couple of days called Mommy by day...Crafter by Night, which is where I found this tutorial for a ruffle pocket tote.  So last night I went over to a friend from my (new) crafting circle's house and sewed a ruffle pocket tote for myself!


I really like the way it turned out, although the ruffle and the pocket were too thick for me to be able to put my presser foot down without it getting jammed, so the top of my ruffle is a little bit wonky.  See?


I've never been that great at sewing down ruffles.  Tips, anyone?  Anyway, hopefully no one will notice the drunken sailor stitch, as I like to call it!


The inside of the bag, the straps and the ruffle are all made from a striped fabric.  I love the way the two look together even though I got really frustrated trying to find a fabric that matched this floral print while I was in Jo-Ann's.

So now I'm going review the tutorial!  I know, right?!  It's been a long time since I've done one of these.  You can follow me after the break to get the review!

Thursday, May 19, 2011

Tutorial Review: Pint-Sized Party Skirt

A couple days ago I showed you this skirt which I made using the Pint Sized Party Skirt tutorial from Creative Spaces:


The skirt is the child-sized version of the party skirt that I made awhile back.

(If you didn't notice, I had enough scrap fabric from my own skirt to make the one for my niece.)

Genevieve over at Creative Spaces (who has been super sweet every time I've talked with her!) made a couple of changes to the pint-sized party skirt to make it toddler friendly.  The main differences (aside from the size, obviously) are the elastic in the waist, which can slide easily over a diaper butt and expand with growth...


...and the sash.  On the adult version, the sash is detachable, but on the pint-sized party skirt is sewn down to help it stay in place when your toddler is busy toddling around.


So now that you know what we're dealing with, let's get on to the review!  Join me after the jump to get the run down. :)

Wednesday, May 18, 2011

Tutorial Review: Quick and Easy No-Hem Skirt

So, I know this means I'm still off-track with my MayFlower event and I promise more flowery posts to come, but today I want to share with you a review for the Quick and Easy No Hem Skirt from Hickety Pickety (great new blog I just found, by the by!) I showed you yesterday.  If you didn't get a chance to see that post, here's the skirt that's up for review:


So let's get started!

Accuracy: 10
Clarity of Directions: 9
Helpfulness of Pictures: 10 
Difficulty: 3
Overall Rating: 10
Time: ~30 min.
Recommended


For the full details, join me after the break. :)

Friday, April 29, 2011

Tutorial Review: Journal Jars from MADE

I actually made some journal jars from MADE way back in December.  It's another one of Dana's genius ideas--a jar full of writing prompts to help you create your own memoir to pass along to whomever.  I made and gave one to my step-sister for Christmas.  She has a (now) 2-year-old daughter.  She'll use the journal jar to help her record her memories and when her daughter is grown, she'll give her the journal to read about her heritage.  My step-sister was thrilled to share the gift with her daughter, so I stowed away this tutorial review for Mother's Day.

Well, guess what?!  Mother's Day is here!  I think this gift would be great for mothers of young children and grandmothers alike, so here comes a tutorial review! 


Click "Read More" below to get the run-down on this project.

Tuesday, April 26, 2011

Tutorial Review: Rolled Rosettes from Happy Together

Hello to my eleven readers.  (Jeez, I am such a dork.)  A few days ago I made a post about some fabric flower hair pieces I made as gifts.  Today I'll be reviewing the rolled rosettes from Happy Together.  Here are the rolled rosettes I made:


 Let's get started!  Click "read more" to see the review.

Monday, April 25, 2011

Tutorial Review: Loopy Flowers from Happy Together

Yesterday you saw all the fabric flower hair pieces I made as gifts for some girls I know.  There were two types of fabric flowers in the post, but today I'll be reviewing just the loopy flowers ones.  Those were the ones that looked like this:


Click on "read more" to get the scoop on the tutorial.

Monday, April 11, 2011

Tutorial Review PEEPS Bunny Bunting Tutorial Review

I took a little time to myself this weekend to do a few craft projects.  I felt I deserved it after all the hard work I've been doing lately, and I finally finished the PEEPS Bunting from MADE that had been sitting half finished since the middle of March.  At last my St. Patrick's Day decorations are down and my Easter decorations are up!  It's about time!


In hindsight, I probably could have gotten to finish them sooner.  I'd already had them all cut out and painted, and since I only did one layer of bunnies it took all of five minutes to sew them down to my pastel polka-dotted ribbon.


 Can you see the resemblance?  I'm so happy with how they turned out.  I bet you want to make some for your home now, so here's the rundown of the tutorial.


Accuracy: 10
Clarity of Directions: 10 
Helpfulness of Pictures: 10 
Difficulty: 1 
Overall Rating: 10
Time: ~1 hr. (not including drying) 
Recommended

Details:


You can't really get any more simple than bunting.  That's why I love it so much.  It's so easy, cheap and versatile, so there's no problem switching even as often as every few weeks for different holidays.

There's not really much to say about this tutorial.  Except for the time it took for the fabric paint to dry, this tutorial took no time at all to finish.  Cutting out the bunnies was the most time consuming part.  The project probably would have taken a little more time than that if I had have used the double layers of bunnies like Dana suggested, but I opted not to since I have a dislike of small curves and I didn't have much time.  They might look a little more polished with two layers, but if you're like me and want to skip out on the second layer, they'll still look just fine.

I used a Q-tip to paint the eyes and noses onto the bunnies and that worked really well and meant that I could just throw away the Q-tip when I was finished to avoid any clean-up.  Dana's instructions to paint the eyes really far apart and the nose really high up was definitely a helpful tip and they came out looking like real PEEPS bunnies.

Not much else to say on the project, other than I would definitely recommend it as a cute, fun and quick sprucer-upper for Easter.  It could probably even be thrown together last-minute for a preschool Easter party or and Easter brunch.  So throw one together using Dana's tutorial, and don't forget to munch on some PEEPS while you're at it! :)

Wednesday, March 2, 2011

Tutorial Review: Party Skirt from Creative Spaces

It's that time again!  Today I'll be reviewing the Party Skirt tutorial from Creative Spaces


This will kind of be a two-step process because instead of writing her own steps for the invisible zipper, the writer at Creative Spaces links you to another tutorial.  I'll review that in a separate post a bit later.  If you didn't get a chance to read my previous post, my party skirt ended up looking like this:


Pretty darn good, huh?  Okay, so I'm still really proud of this one.  But let's get on to the review!


Accuracy:  10
Clarity of Directions:  7
Helpfulness of Pictures:  7
Difficulty:  6.5
Overall Rating: 8.5
Recommended

Details:

First of all, let me just say I would recommend this tutorial to anyone simply because I love, love, love the way my skirt turned out!  But before I got to that point, here's what I experienced.

I read through this tutorial two times before ever getting out my fabric or sewing machine, and I still had some difficulty understanding the directions.  The steps didn't appear to be separated by paragraph or any logical fashion.  Instead, they all sort of ran together.  Maybe it's just me, but if you choose to try this one out, be sure you read through it at least once before starting to avoid making mistakes.  But that's generally a good idea, anyway. :)

As far as the pictures go, they pictures weren't bad pictures, but they didn't always seem to represent the steps which the author was discussing at the time.  In addition, there didn't seem to be a picture for each step.  Luckily in this tutorial it wasn't as necessary to have a picture for each step, so it didn't affect me too much.

Those things aside, though, I loved how easy it was to create my own pattern.  I don't think it could be made any easier than doubling your waist measurement!  Bravo on that, Creative Spaces.  

And did I mention the skirt is absolutely adorable?  This tutorial gets my recommendation!  It was really easy and fun to sew, and the only reason you might consider not doing it is if you're a very new sewer and think you might not be able to conquer that invisible zipper.  So, go on and give it a try if you wanna! :)

P.S. Review of the invisible zipper tutorial is coming tomorrow, so check back if you want the whole picture.

Monday, February 21, 2011

Tutorial Review: Circle Skirt from MADE

Today we'll be reviewing the Circle Skirt Tutorial from MADE.


So here's how mine turned out:


Looks pretty good, huh?  I can dress it up like this to wear to work, or I can dress it down with a t-shirt and my Sperries.  And guess what?  The fabric was 60% off at JoAnn's, so the skirt cost me a total of $4 to make.  That's what I call dressing on a budget!


I also made a toddler sized version for my niece.  It's in a jersey knit (also purchased on sale) with colorful giraffes on it.  It didn't turn out quite as well due to my inexperience with knits.  The fabric seemed to gather and quit moving through the machine if I didn't stretch it, but got wavy if I did.  (I guess it's about stretching the right amount?)


The waviness of the skirt hides the waviness in the fabric pretty well, though, so it still looks alright.  Although, I think I made the skirt waaay too long for a two year old.  I might have to go back and re-hem it.


On to the tutorial review:


As always, Dana's tutorial was EXTREMELY simple to follow.  (If you haven't already, you should really check out her blog!  Lots of great, easy-to-follow tutorials.)  The tutorial walks you through making your own pattern in this tutorial which is always a daunting thing for new sewers.  But Dana's incredibly clear directions break down the geometry so it's as easy as pie.

She even tells you which fabrics will work best with the tutorial.  I didn't happen to follow that advice because I got such a good deal on the fabric I used and I didn't want to waste the good polka dot satin fabric I picked out until I tested my pattern on something cheaper.  The fabric does bunch around the hips like the tutorial said it would, but it's not too noticeable.  (Be looking for the satin polka dot circle skirt when I review the elastic dyeing tutorial from MADE.) 

The tutorial didn't take too long start to finish and was a good afternoon project.  I would recommend this tutorial for even the newest sewers, so try it out today!

Friday, February 4, 2011

Time for another tutorial review!

Okay, so this one is a little different because I used half a pants pattern from Simplicity and half the Paper Bag Skirt with Ruffled Pockets tutorial from A Lemon Squeezy Home. In short, I'm not reviewing the skirt portion of the Paper Bag Skirt with Ruffled Pockets...just the finishings (or the belt loops, belt, and ruffled pockets).

Here's what I came up with:


I'm really proud of how they turned out, even though I got one of the pockets on there a little crooked. It was my first time sewing with a pattern instead of a tutorial online and, despite my sewing machine breaking haflway through and having to be fixed, I have to say I think I did a pretty good job.

I wish I could have a child model them for you, but they're for my niece who lives up in St. Louis and I'm all the way down here in Florida! I'll have to have my sister take pictures for you all once she gets them in the mail.

Here are some close-ups of the finishings taken from the Paper Bag Skirt tutorial:


The tutorial review:

I found the instructions for the belt loops and the belt very simple to follow. They really jazzed up the plain elastic pants pattern that I used from Simplicity and might as well have been pajamas they were so plain.

However, the ruffled pocket portion of the tutorial was a little more difficult. If I hadn't already known how to make ruffles, I'm not sure I would have been able to figure it out. In addition, it was a little bit difficult to sew the pockets on. I don't know if it was because they were so small, the fact that they were rounded, or just that I'm not a very experienced sewer, but one of mine ended up pretty crooked.

Another important thing to mention about the tutorial was the print out pattern for the pockets. The long rectangle that prints out for the ruffle is definitely not the same size as the rectangle used in the post. It was so narrow I had a hard time working with it. However, it made a cute, more modest ruffle, so if you're not afraid to work with it and you want something a little less bold, I say go for it. But if you like the look in the post and/or you want something easier to work with, definitely make your own rectangle that's much thicker.

All-in-all, the tutorial was cute and fairly simple to follow. I wouldn't really recommend it for a beginning project, but if you're an intermediate or experienced sewer it's a piece of cake. Overall, I give it an 8/10.

Happy sewing and see you next time!

Saturday, December 18, 2010

Flower Petal Pillow Review

So I said the last post would be my last for awhile, but I lied! I realized this one wouldn't make any sense to share after Christmas...so here it is!

Awhile back I tried out the Petal Pillow Tutorial from Cluck Cluck Sew. It was actually my very first sewing project, so it didn't turn out quite as ornate as the one in the tutorial, but it still looks pretty good. In fact, people who haven't seen the tutorial don't know that the petals could be fuller and have actually given me compliments. (Sorry for the quality of this photo...I took it on my phone.)


The tutorial was easy to follow...my pillow turned out wonky because of my own mistakes (i.e. I didn't read the directions closely enough and my circles weren't big enough. Reading directions seems to be a common problem of mine, doesn't it?) I'd recommend this tutorial to all skill levels. If I managed it as my very first sewing project, you can, too!

I made the flower petal pillow just before Thanksgiving and I thought it might be nice to have a more wintery version of it. I decided on a felt applique Christmas tree. I cut the same half circles (all in the smaller size), but folded them into "loops" and sewed them onto the pillow with a zig-zag stitch in the general shape of a triangle. I made the triangle into a tree by using some scrap fabric to sew on a trunk.


Since I wasn't going off a tutorial, it took me awhile to get it down quite right. It's a little off, but from a distance you can't tell as much and it looks nice on my red blanket right next to the Christmas tree.


Happy Holidays! :)

Thursday, December 16, 2010

Pocket Tissue Tutorial Review and a Fail

I haven't had a lot of time to sew lately between my boyfriend graduating from college and his parents being in town and trying to finish up my Christmas shopping before we drive back home to Missouri. I got finished and wrapped up, though!


Notice no bows on the boxes or tissue paper on the bags because the kitty would eat it before it was time to open the presents.

Between all this, though, I managed to fit in time to use the pocket tissue tutorial from Sew, Mama, Sew that I'd been meaning to try. I thought it would be quick and easy. The directions were simple enough and it was basically just sewing straight lines, so I was surprised when I messed up the first one. My seam allowances were too wide and I made it way to short for tissues. Oops!


So I made another. The second turned out a little better, than the first, but it still wasn't quite long enough for tissues.


I noticed that the seams on the inside were crowding the tissues, and when I flipped the pocket tissue holder inside out to take the last picture, I got an idea. What if the seams were on the outside? So I sewed another one my own way, with the seams on the outside and a zig-zag stitch to make it look cute that way. And, sure enough, the tissues fit perfectly!


The conclusion? I would recommend this tutorial, but make sure your seam allowances are nice and tiny, or maybe cut your fabric a little bigger. It's especially great for scrap fabric and it's definitely very simple and quick to do, even for new sewers.

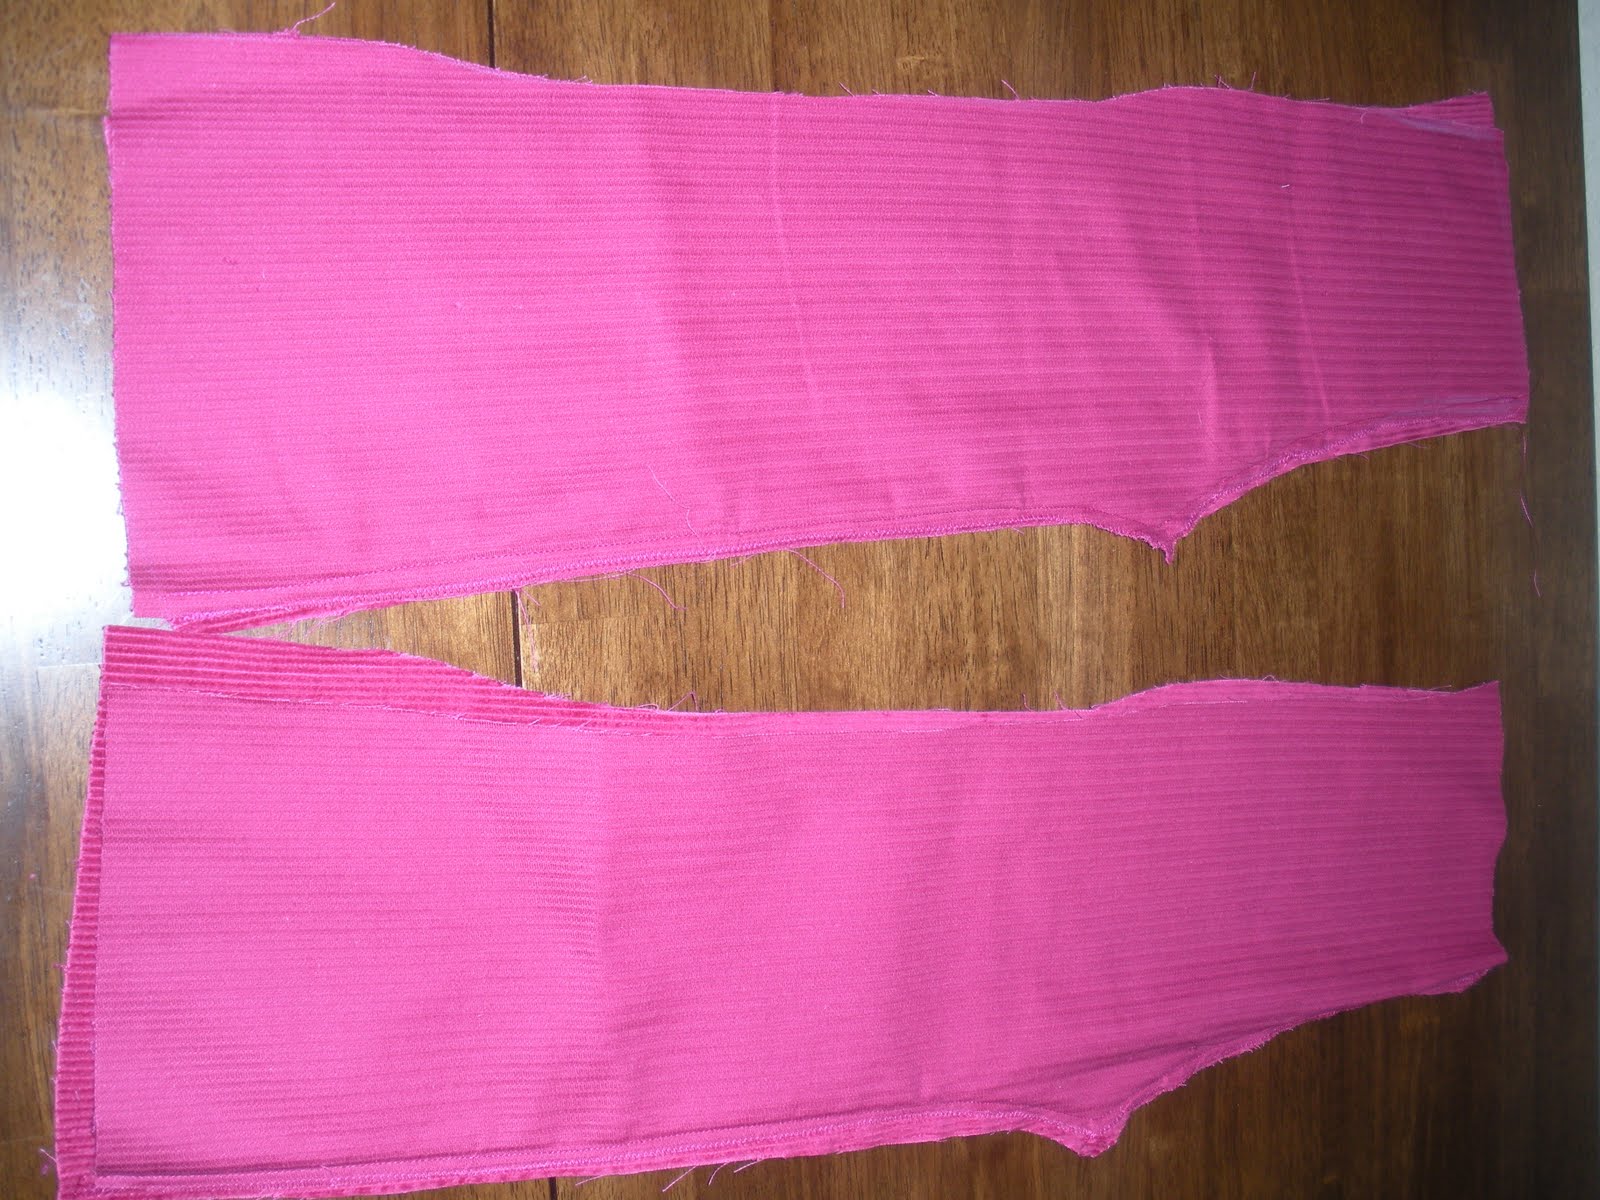
After finishing the pocket tissue tutorial I decided to take a stab at a pair of corduroy baby pants that I've been meaning to make for my step-niece. I used MADE's tutorial to make my own pattern. I carefully made the pattern based on some baby pants I'd already bought for Christmas and then I started to sew. I sewed up the side just like I was told...


...or maybe not just like I was told.


When I went to sew them together I noticed there was something wrong...they were sewed up to the top from the crotch! I didn't read the tutorial closely enough and I sewed up the wrong side, it turns out.

I couldn't be bothered to rip out the seam, since I so diligently serged the seam so it wouldn't ravel before noticing it was the wrong side. I'll have to try these again on another day.

Flower petal tutorial review and my VERY OWN tutorial coming up soon! :)

Sunday, December 12, 2010

Christmas Stockings

I completed my first tutorial! I used this stocking tutorial from Noodlehead to make four stockings for my "family" (i.e. Me, my boyfriend, the cat and the dog).


The tutorial was easy to follow--perfect for my first sewing project! I'd recommend it to any other beginning sewers out there.

I did notice a few things:

  1. The tutorial tells you to add a couple of inches to the top of the pattern when you're cutting out the fabric. I did this on the first stocking and it was way too much. On the next three I didn't add any extra fabric and it worked just fine.
  2. It took a lot longer than the tutorial said it would! However, this is probably because I'm such a new sewer.
I did two of the stockings in green snowflake fabric with red trim and two with red fabric and green trim. I think they look great together!


All in all, I think they turned out pretty well with only minor mistakes here and there. I love the hand emboidered nameplates. They really brought some more Christmas cheer to my living room!

Related Posts Plugin for WordPress, Blogger...