Monday, May 27, 2013

DIY Pastel Colored Denim Refashion

Back in the early spring I bought a mint colored pair of skinny jeans at LOFT.  I loved them, and I wanted another pair in lavender.  I couldn't find quite the shade I wanted so I started thinking to myself, "I'm crafty.  Why not make them myself?"  So I grabbed a pair of jeans I already had on hand that fit well but I never liked the wash, and I bleached them and dyed them purple.  This is what I came up with:

Step 1:  Bleach Your Jeans in a Bleach/Hot Water Mixture

What I can say about this project is that it's not necessarily hard, but it sure takes patience!  I read a lot of tutorials online to try and figure out how long to bleach jeans until they're white and got a lot of conflicting information.  From what I can determine, the amount of time needed to bleach the jeans white varies based on how dark the wash on your jeans is, on what material the denim is made of, etc.  My jeans took about 6 hours to bleach to (almost) white.

The bleach to water ratio also varies from project to project.  I originally tried to use 3 cups of bleach with the water half full in one of those big plastic tubs for soda that you get at Target or Walmart.  This turned out not to be enough bleach, so I kept adding bit by bit until I started to achieve some results.  Also make sure the water you're using is HOT.  It really helps. :)


As your bleaching the jeans, make sure you stir periodically.  The jeans will want to float a bit, so stirring them will make sure they're getting bleached evenly.  Do not use a kitchen utensil--I used my tongs and it ruined them.  Whoops!

One last note about the bleaching process--my jeans never got completely white before the bleach started eating away at the fabric.  They were sort of splotchy and greenish white at this point, but rather than let the bleach eat away at the fabric I decided to remove them.  I was worried this would make them dye unevenly, but it didn't cause any problems.  So get your jeans as white as you can, but don't worry if they're not perfect.

Step 2: Wash Your Jeans

After your jeans are as white as you can get them, run them through a normal wash with soap in your washing machine to wash out the bleach.

Step 3:  Dye Your Jeans

Did you know you're not limited to the colors on the shelf when you choose your dye?  I used the RIT color dye guide to choose my color.  It used just a tiny amount of dye--1/8 tsp. purple and 1/8 tsp royal blue--to get the super light lavender color I was dreaming of.  It may not seem like the dye bath is dark enough if you're dying a pastel color, but resist the urge to add more dye to the bath!  Remember how long it took to get your jeans white?  It only takes 30 minutes to dye your jeans, so worst case you can dye them a shade darker once finished. :)

Once you've chosen your color, mix the dye with hot water and 1 cup salt.  Put your jeans in and stir constantly for 30 minutes.  I set a timer and watched an episode of Pawn Stars while dying my jeans.  The time flew by before I knew it.


Step 4: Give Your Jeans a Final Wash

After your 30 minutes in the dye bath is up, rinse your jeans and put them in your washing machine on a normal cycle with soap.  Dry them, and you're (finally) done! :)


I noticed after I got my jeans out that there were a few boo-boos.  The seams didn't dye as well at the top, so I'll wear the jeans with a longer shirt.  Also, where the bleach ate away at the jeans a little the fabric absorbed more color, but that kind of gives the jeans character.


My final words of wisdom about this project--it's not perfect.  Expect your jeans to have a few flaws, but know that you're getting a trendy piece to add to your wardrobe for a fraction of what you would have paid in the store. (Since I already had these jeans on hand this project cost me about $3 for the dye.)  Don't be intimidated because it really is easy--it just takes a bit of time!  So if you've got some patience, give it a try! :)


Happy crafting!

Thursday, May 23, 2013

Key Lime Cupcakes with Vanilla Cool Whip & Pudding Frosting Recipe

This week I helped an old friend celebrate her 25th birthday by baking her some delicious key lime cupcakes.  (I actually used regular limes though.  Shh!  Don't tell!)

I chose a cool whip and vanilla pudding frosting because 1) I've seen everyone ranting and raving about it on Pinterest and 2) I thought the light, airy frosting would be the perfect compliment to such a fruity, summery cake.


I thought the frosting might not hold up well and slide off the cake, but it actually holds up quite nicely.  I guess that's the pudding doing its work. :)

I zested some of the leftover limes and sprinkled it on top to give the cupcakes a little color and extra zing.  They were to die for!  I loved this recipe.


The recipe actually made a little bit extra batter, so I filled a bread pan with the leftovers.  I cut the thin rectangular cake in half and made it into a tiny square layer cake for the birthday girl.  I decorated the top with a half slice of lime.


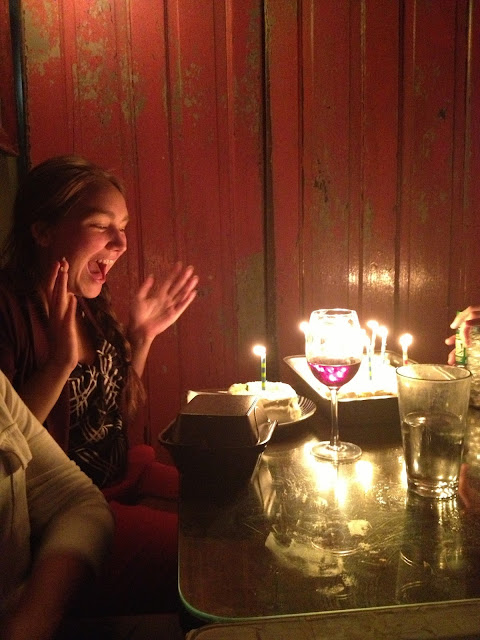
We took the cake to a local Italian restaurant and enjoyed it with wine after a nice dinner with friends.  The look on my friends face before she blew out the candles says it all.  This is totally why I love crafting, baking, and all things homemade. :)


If you'd like to try the recipe out yourself (which I highly recommend you do!), the recipe is below.  (You can also find the original recipe for the cupcakes at My Madison Bistro here.)  Enjoy!

Key Lime Cupcakes
adapted from Bon Appetit, Sept 2008
1 ¾ cups cake flour
½ teaspoon baking powder
½ teaspoon baking soda
½ teaspoon salt
1 stick (1/2 cup) cool unsalted butter, cut into 8 pieces
1 ¼ cups granulated sugar
2 large eggs (room temperature)
2 ½ tablespoons key lime juice
1 tablespoon key lime zest
1 drop green food coloring paste
¾ cup buttermilk (room temperature)
Preheat oven to 350*F. Line a muffin tin with 12 paper liners.
Sift the cake flour, baking powder, baking soda, and salt three times, set aside.
Using a mixer fitted with the paddle attachment, beat the butter on low until it’s softened a bit. Add the sugar and increase the speed to medium. Beat until fluffy, about four minutes. Add one egg at a time, beating well after each addition. Add the lime juice, zest, and food coloring and beat until mixed. (The mixture will look curdled.)
Add the flour in three additions, alternating with the buttermilk, beginning and ending with the flour, scraping down the bowl as necessary. Mix on low until just combined. Fill each cupcake liner 2/3 full.
Bake 20-25 minutes. Cool completely and frost with cream cheese icing.
Makes 12-14 cupcakes.
Cool Whip Vanilla Pudding Frosting
1 8oz container Cool Whip or whipped topping
1 package Vanilla (or any flavor) instant pudding mix
1 cup milk
In a medium bowl, combine pudding mix with milk.  Whisk until smooth and thickened.  Fold in container of Cool whip until thoroughly mixed.  Spread over cake.

Related Posts Plugin for WordPress, Blogger...