Friday, December 24, 2010

Apparently I made a Knock-off

Look familiar?


I found this pillow in a furniture and home decor store, Arhaus, while I was home. I was so excited because it looks just like my flower petal pillow.


Except the pillow in the store cost $54 and mine probably only cost me a total of $10 or $12 to make. Wow! So neat. :)

Saturday, December 18, 2010

Flower Petal Pillow Review

So I said the last post would be my last for awhile, but I lied! I realized this one wouldn't make any sense to share after Christmas...so here it is!

Awhile back I tried out the Petal Pillow Tutorial from Cluck Cluck Sew. It was actually my very first sewing project, so it didn't turn out quite as ornate as the one in the tutorial, but it still looks pretty good. In fact, people who haven't seen the tutorial don't know that the petals could be fuller and have actually given me compliments. (Sorry for the quality of this photo...I took it on my phone.)


The tutorial was easy to follow...my pillow turned out wonky because of my own mistakes (i.e. I didn't read the directions closely enough and my circles weren't big enough. Reading directions seems to be a common problem of mine, doesn't it?) I'd recommend this tutorial to all skill levels. If I managed it as my very first sewing project, you can, too!

I made the flower petal pillow just before Thanksgiving and I thought it might be nice to have a more wintery version of it. I decided on a felt applique Christmas tree. I cut the same half circles (all in the smaller size), but folded them into "loops" and sewed them onto the pillow with a zig-zag stitch in the general shape of a triangle. I made the triangle into a tree by using some scrap fabric to sew on a trunk.


Since I wasn't going off a tutorial, it took me awhile to get it down quite right. It's a little off, but from a distance you can't tell as much and it looks nice on my red blanket right next to the Christmas tree.


Happy Holidays! :)

Poinsettia Dog Collar Embellishments

NOTE: I've now made a dog collar embellishment tutorial which can be found on the tutorials page.

A couple days ago I had to pick one more last-minute Christmas present, so I headed to the open air mall near my house. Shoppers frequently bring their dogs to this mall and on this particular outing I saw a Yorkie with a giant flower bow attached to her head. Inspiration hit!

Our Pomeranian, Monica, refuses to wear bows. She's always pawing them off her head...I guess they irritate her. So my mom started sewing bandannas that slide over her collar about two years ago. I decided I could easily make a flower slide over her collar in the same way.

Since it's the Christmas season, I decided what better flower than a Poinsettia to embellish her collar? I didn't have a tutorial in mind, so I turned to Google to help me out with the details. I just searched for "Felt Poinsettia tutorial" and came up with this tutorial to guide me through my own flower-making extravaganza. I used the pattern to cut out the felt, but sewed it together my own way. This is what I came up with.


I ended up making two. One of them with a lot of petals...


And one of them with fewer flower petals.


I cut a short piece of elastic and sewed it onto the flower on one end with a zig-zag stitch to make sure it was nice and secure. To make the loop, I just tucked the other end of the elastic under and hot glued it down.


Then it was all ready to slip onto her collar! Doesn't she look adorable?


I think they turned out pretty well. This was a fun, quick little craft project and Monica will look so festive when we go up to see our family for Christmas! A more rounded flower petal might even be cute all year round. I may make a tutorial for this some other time when I'm not so busy with the holidays.

Off to Missouri for two weeks on Monday, so don't expect any posts from me for awhile. Merry Christmas and Happy New Year until next time!

Thursday, December 16, 2010

Pocket Tissue Tutorial Review and a Fail

I haven't had a lot of time to sew lately between my boyfriend graduating from college and his parents being in town and trying to finish up my Christmas shopping before we drive back home to Missouri. I got finished and wrapped up, though!


Notice no bows on the boxes or tissue paper on the bags because the kitty would eat it before it was time to open the presents.

Between all this, though, I managed to fit in time to use the pocket tissue tutorial from Sew, Mama, Sew that I'd been meaning to try. I thought it would be quick and easy. The directions were simple enough and it was basically just sewing straight lines, so I was surprised when I messed up the first one. My seam allowances were too wide and I made it way to short for tissues. Oops!


So I made another. The second turned out a little better, than the first, but it still wasn't quite long enough for tissues.


I noticed that the seams on the inside were crowding the tissues, and when I flipped the pocket tissue holder inside out to take the last picture, I got an idea. What if the seams were on the outside? So I sewed another one my own way, with the seams on the outside and a zig-zag stitch to make it look cute that way. And, sure enough, the tissues fit perfectly!


The conclusion? I would recommend this tutorial, but make sure your seam allowances are nice and tiny, or maybe cut your fabric a little bigger. It's especially great for scrap fabric and it's definitely very simple and quick to do, even for new sewers.

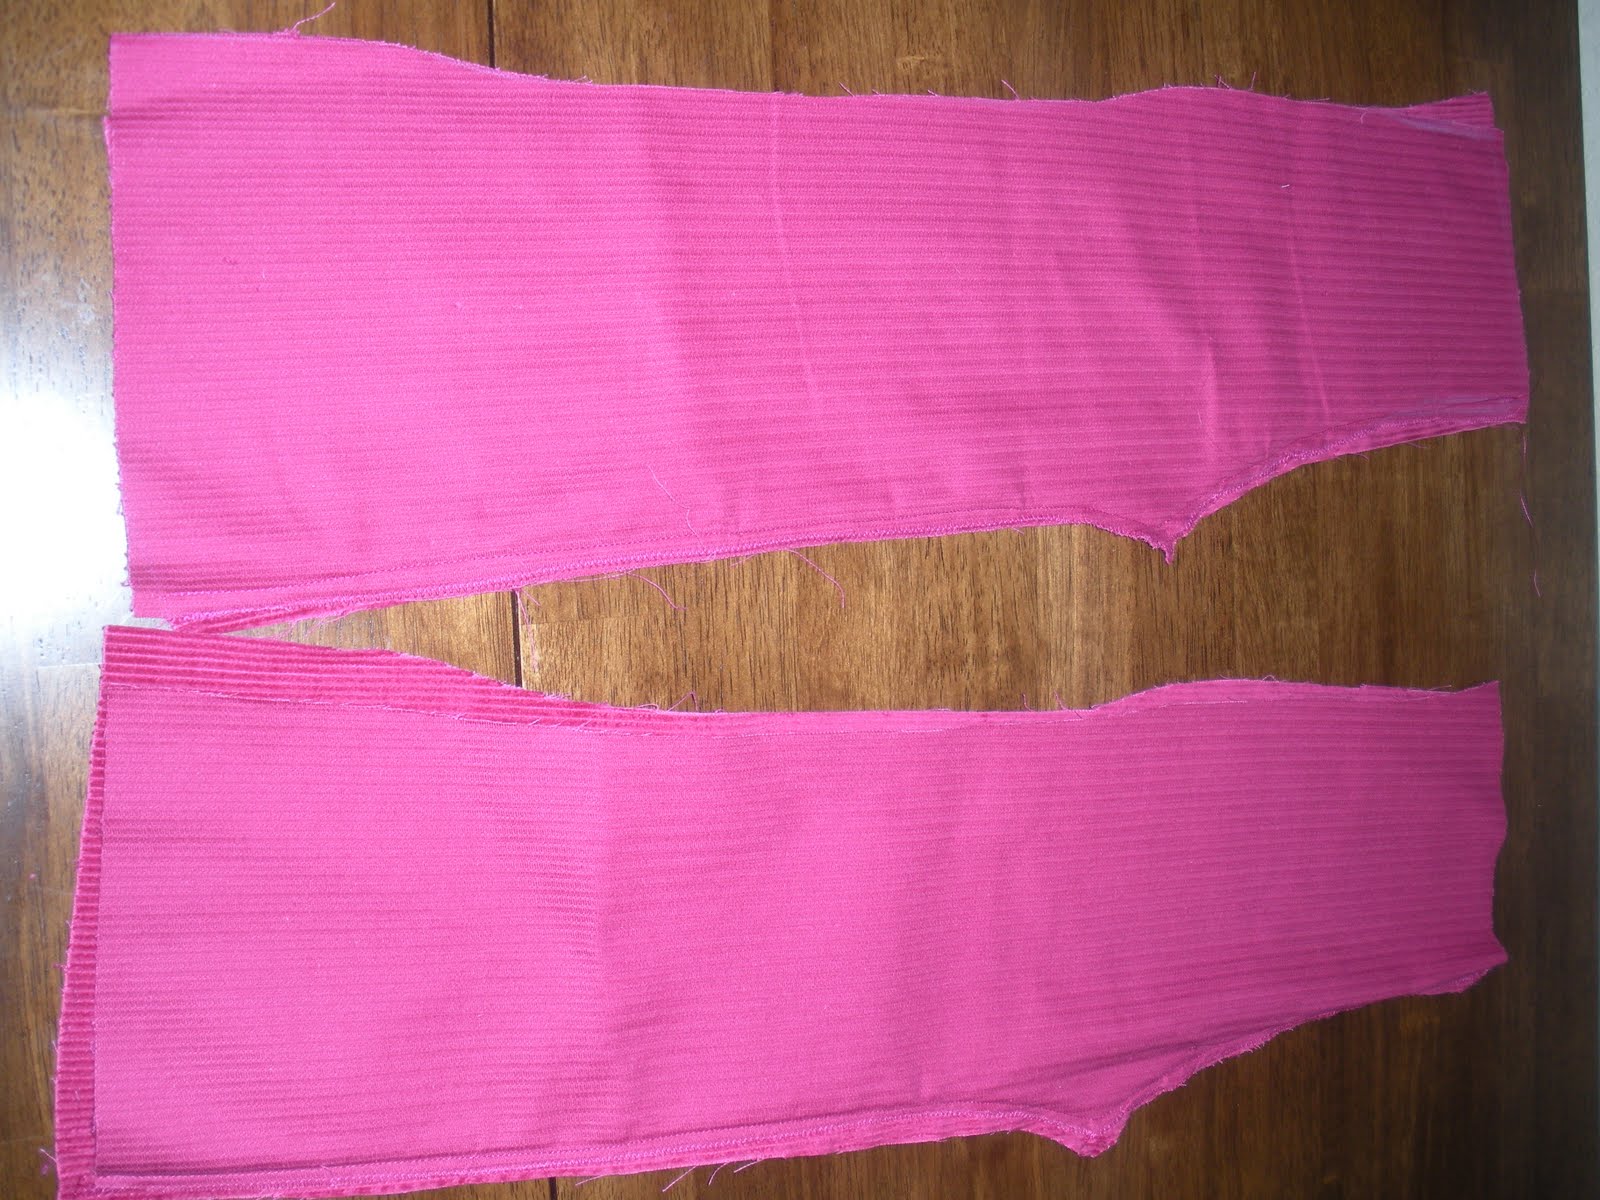
After finishing the pocket tissue tutorial I decided to take a stab at a pair of corduroy baby pants that I've been meaning to make for my step-niece. I used MADE's tutorial to make my own pattern. I carefully made the pattern based on some baby pants I'd already bought for Christmas and then I started to sew. I sewed up the side just like I was told...


...or maybe not just like I was told.


When I went to sew them together I noticed there was something wrong...they were sewed up to the top from the crotch! I didn't read the tutorial closely enough and I sewed up the wrong side, it turns out.

I couldn't be bothered to rip out the seam, since I so diligently serged the seam so it wouldn't ravel before noticing it was the wrong side. I'll have to try these again on another day.

Flower petal tutorial review and my VERY OWN tutorial coming up soon! :)

Sunday, December 12, 2010

Christmas Stockings

I completed my first tutorial! I used this stocking tutorial from Noodlehead to make four stockings for my "family" (i.e. Me, my boyfriend, the cat and the dog).


The tutorial was easy to follow--perfect for my first sewing project! I'd recommend it to any other beginning sewers out there.

I did notice a few things:

  1. The tutorial tells you to add a couple of inches to the top of the pattern when you're cutting out the fabric. I did this on the first stocking and it was way too much. On the next three I didn't add any extra fabric and it worked just fine.
  2. It took a lot longer than the tutorial said it would! However, this is probably because I'm such a new sewer.
I did two of the stockings in green snowflake fabric with red trim and two with red fabric and green trim. I think they look great together!


All in all, I think they turned out pretty well with only minor mistakes here and there. I love the hand emboidered nameplates. They really brought some more Christmas cheer to my living room!

Thursday, December 9, 2010

And sew I begin...

...to sew my way through all the best sewing tutorials on the internet! (I apologize for the really bad pun, but I couldn't resist.)

As a senior advertising student, I don't have a lot of free time to dedicate toward envisioning my own crafty creations, so I plan on teaching myself to sew by stealing other peoples' ideas. Gotta start somewhere, right?

I'll be reading my favorite sewing blogs (in between reading all my ad industry blogs, of course) and trying out some of the most appealing tutorials. I'll display my handiwork here for you, as well as give you a review of the tutorials I use.

Sew stick around and see what I come up with! (Sorry...I promise not to make this bad joke again!)
Related Posts Plugin for WordPress, Blogger...