Friday, September 30, 2011

Free Fall Printable


Now, I'm no graphic designer but I saw this quote about fall somewhere recently and decided to try and make it into a printable.  Here's what I came up with:


You can download and print it for free here.  I hope you like it!  It's my first attempt at a printable so go easy on me, okay?  ;)

Anyway, thanks for stopping by today.  Hope to see you again soon!

--CC

Wednesday, September 28, 2011

Ruffle Cuff Pant Legs

Just a quickie to share something great I found today.   If you liked my Knot No-Hem Pants tutorial, I'm sure you're going to love these from A Mother Huddle:

Source
This Ruffle Cuff Pants tutorial shows you a great way to transform pants that are either too short or too long into ones that fit and are completely adorable.  I wish I were younger so I could make some of these for myself! 

Thanks for stopping by!  Happy crafting. :)

--CC

Monday, September 26, 2011

Tutorial: Bow & Whimsy Tank Top

You might remember few weeks ago I showed you my "A Bow and Whimsy Tank Top" in another post


Well, that same week I also shared a tutorial for the blouse over at a blog called Sunny Vanilla.


But just in case you missed it, today I thought I'd share the tutorial here at Crafty Critique.  You can follow me after the jump for the how-to.  Enjoy and let me know if you have any questions! :)


Wednesday, September 21, 2011

Looking for Guest Bloggers

Good news everyone!  I got my first "big girl" job offer this week and I'll be starting my first full-time, post-college job very shortly.  I'm excited for the opportunity, but also a little nervous about how I'll manage my time once I begin.  I'm sure I'll adapt quickly, but I'm not too sure how much free time I'll have on my hands for blogging and crafting over the next couple of months.  So that's where you come in!

I'm sure I'll be able to make time for sewing and blogging eventually, but while I get settled into my new job I thought some of you might like the chance to guest post on my blog!  If you're a crafting blogger, I'd love to have you come post a tutorial.  It can be something new or old.  I don't mind!  Or maybe you have an Etsy shop and would like to host a giveaway to promote your business.  That's fine too, and I'd be really glad to team up with you!

If you're interested in guest posting on Crafty Critique, please send me an email at mseaber (at) gmail (dot) com with subject line "Guest Post."  Please let me know these things in your email:
  1. Link to your blog
  2. Link to the post you'd be sharing, or if it's a new post please send me pictures and/or a description of what you'd like to post about
  3. When you'd be ready to schedule your guest post
I'm not sure what kind of interest to expect from this post and as I've already mentioned I've kind of got a lot on my plate right now, so please be patient with me just in case I get a whole bunch of emails and can't respond to you right away!  ;)  I promise to do my best, though!

As always, thanks for stopping by!  I hope to hear from you soon. :)

--CC 

Monday, September 19, 2011

Jute & Felt Mum Fall Wreath

Hi guys!  Sorry I haven't written since last week.  Life was calling!  I hope that you haven't missed me too much and you've been crafting up a storm without me. ;)

Anyway, I had some time to whip up a new fall wreath today, so I thought I'd drop in and share it with you.


I didn't have time to make a full tutorial, but it's a pretty simple concept so I'll just explain verbally what I did.  I started with a foam wreath (be sure to check out this money saving tip for foam wreaths if you do this project) and wrapped it with some jute I already had on hand.


Next I decorated the wreath with two berry sprigs (99 cents each and 40% off this week at Michael's).  I was able to simply work the wire stems into the foam core of the wreath.  Then I hot glued a whole bunch of felt mums in between the two sprigs.


If you're wondering how I made the felt mums, I did take a few photos of the process.  Here's what I did (please note I didn't have the time to take the best photos to show you how to do this):


As I made the mums I realized the shorter the fringe the better the mums looked, so I gave them little haircuts.  So you might want to adjust your original rectangle to 12"x1".  Anyway, I made about 10 felt mums using that process and hot glued them between the two berry sprigs until I liked the way they looked.


Then, to make the banner, I tied another long piece of jute across the wreath.  I cut diamonds out of colored cardstock scrapbooking paper and folded them in half over the strand of jute and glued them together.  (I sure hope that makes sense!)  I used some scrapbooking alphabet stickers to spell out the word "Fall."


And ta-da!  All finished.  :)  I really like the scrappy look of my new wreath, and the whole project cost me about $3 to make since I already had so much of the supplies on hand.  What do y'all think?


I hope your enjoying some fun fall crafts!  Thanks for reading and see you next time! :)

--CC

This post is linked up here.

Monday, September 12, 2011

DIY Fall Projects & Decor Roundup

Hello my lovelies!  How have you been?  The weather here has been absolutely fantastic--cool, crisp, and breezy!  Okay, so maybe it's just been below the 90s for a couple of days but here in Florida that means FALL!  And I am so excited for cooler weather and fall holidays, which is why I've put together this fall roundup for you.

This roundup is for fall/autumn decor ONLY.  In other words, it doesn't include Halloween or Thanksgiving projects.  Don't worry...we'll get to that later.  :)  But for now it's just the good ol' seasonal stuff to get you in the mood for fall!  Please note that tutorials and sources for all images are included as links in the descriptions.  Enjoy!

Burlap Projects

Pumpkin Projects


Inexpensive Fall Projects

Fall Wreath Inspiration

That's all I've got for you here, but you can find lots more (including Halloween and Thanksgiving tutorials) on my fall pin board over on Pinterest.

Thanks for stopping by.  Hope to see you again soon!

--CC

Friday, September 9, 2011

Cut Out + Keep

Last night I decided to join Cut Out + Keep.


If you haven't heard of the website before, basically it's a crafting community where people share tutorials, talk to each other on a community board, and participate in crafting contests.  I'd heard of it here and there over the past year and visited a few times, but just decided to join last night.

Image Source
 After reading this post yesterday, I decided to give Cut Out + Keep a try to see if I can't make some more friends who enjoy the crafting and blogging.  Because my boyfriend and my mom really don't want to listen to me babble about Google Analytics, blog swaps, SocialSpark, or exceeding my storage limit on Picasa, but maybe someone on Cut Out + Keep will actually care! 

Do any of you use Cut Out + Keep?  What are your thoughts about it?  Like?  Dislike?  I'm still trying to figure out if I like it or not.  So if you do use it, come be friends with me and let's get to know each other! :)  I've already posted a few tutorials on the site (oldies but goodies!).

Thanks for reading.  I'll see you there!

--CC

Thursday, September 8, 2011

Handmade Fall Wreath

After the tropical storm passed through the Gulf last weekend, the temperature here in Florida cooled off dramatically.  It almost feels like fall!  So it felt like time to drag my fall decor out of the garage, and now this autumn wreath is hanging on my front door:


I actually made this wreath last fall.  I even cheated on the picture--it's from last fall at my old apartment!  But I didn't have a blog then so I thought it was only fair that I get to share it with you now!  I can't take credit for the creativity (although I wish I could because I love the way this wreath turned out!).  The idea came from one of the free projects that they have hanging in the aisles at Jo-Ann's.  But I'll let you know how I made it, anyway! :)

I started with a grapevine wreath, then hot glued magnolia leaves and those "fall picks" that they have at Jo-Ann's (but you could use a substitute such as faux apples, gourds, pumpkins, berry sprigs, or whatever you like for a different look) all over the wreath.  Next, I lightly coated the whole thing with gold spray paint (again, you could use whatever color you like) and loosely wrapped the ribbon around the circumference of the wreath, tying it in a bow at the bottom and hot gluing it in place as needed.  And viola!  It was beautiful and I'm still proud of it a year later!

Have you made any fall decorations that you're particularly proud of?  Tell me about it or share a link with me in the comments!  I'd love to see! :)

This post is linked up here.

Wednesday, September 7, 2011

Blog Swap: Felt Interactive Book Tutorial from Sunny Vanilla

Hello my lovely readers!  The day of my blog swap with Jennifer from Sunny Vanilla is finally here!  Jennifer is here to share her Interactive Felt Book tutorial with you, and I'll be over on her blog sharing my tutorial for my A Bow and Whimsy Tank Top!
 
A Bow and Whimsy Tank Top
If you haven't met Jennifer, she sews and crafts some pretty lovely things and shares them over at Sunny Vanilla.  Here are just a few of my favorites:


But she can introduce herself better than I can!  So take it away, Jennifer!

Hello, my name is Jennifer from Sunny Vanilla and I'm really excited about my blog swap today with Madison at Crafty Critique.  Just a bit about me, I am a lover of crafts and fabric and basically taught myself how to sew through inspirational books at the library and watching more youtube videos than I can count.  Outside of crafting and sewing, I am a mom to a 13-month old baby girl and a wife to a certain boy who stole my heart in high school.  I love dancing, travelling, singing terribly in the car, eating the tops of muffins, and screaming the fight song to my alma mater.  I hope you enjoy my interactive felt book tutorial.

There are two things I love about this project: it’s easy to put together {if you have older children, allow them to join in the project} and all of the materials needed are most likely things you already have in your house.

Sunday, September 4, 2011

A Bow & Whimsy Tank Top + A Surprise

Hello my lovely readers!  How are you today?  I'm so excited today because I get to show you something I sewed last week and have been so impatient to get to share with you!  Drum roll please...


Ta-da!  I call it "A Bow and Whimsy Tank Top," and I just adore the way it turned out. 


The oversized bow attached at an angle on one side of the tank top reminds me of Italian carnivals, tea parties, colorful balloons, woodland picnics, Sunday brunch and all things birthday, which is why I gave the sleeveless blouse its name.


Even better than how it turned out is how much it cost to make!  I thrifted the main fabric (2.5 yards for 50 cents) and made the bow out of a remnant from Jo-Ann's.  So, including the bias tape and interfacing in the shirt, it still cost me less than $2 to make.  No way, right?!


I finished this last Thursday and have been absolutely dying to show you!  So why have I waited so long?  Because I had an announcement to share with it!  So here it is: 
This Wednesday I'll be doing a guest tutorial for this top over at Sunny Vanilla.


And Jennifer from Sunny Vanilla will be sharing a tutorial for her "I Love You More Than..." Felt Book here at Crafty Critique. 

Never met Jennifer?  Well, allow her to introduce herself:

"Hello, my name is Jennifer @ Sunny Vanilla and I'm really excited about my blog swap with Madison at Crafty Critique.  Just a bit about me, I am a lover of crafts and fabric and basically taught myself how to sew through inspirational books at the library and watching more YouTube videos than I can count.  Outside of crafting and sewing, I am a mom to a 13-month old baby girl and a wife to a certain boy who stole my heart in high school.  I love dancing to the Mickey Mouse Clubhouse theme song, singing terribly in the car, eating the tops of muffins, and screaming the fight song to my alma mater.  I hope you enjoy my, "I love you more than..." felt book tutorial."

Thanks Jennifer!

And thanks to all of you for reading today!  Don't forget to stop back by here Wednesday for Jennifer's tutorial, and if you're interested stop by Sunny Vanilla on the same day to get the tutorial for the A Bow & Whimsy Tank Top! :)

Until then, happy crafting!

--CC

This post is linked up here.

Friday, September 2, 2011

5 Steps to Writing an Awesome Tutorial

When I first started sewing, I turned to online tutorials to teach me my basic skills and quickly realized that some tutorials are really amazing and helpful, and others, while well-intended, can be complicated and confusing.  That's why I originally started this blog.  I wanted to use my experiences to review tutorials and direct other beginning sewers to the best of the best so they wouldn't have to stumble over poorly written tutorials like I did a few times!


Eventually I started writing my own tutorials and learned that it's not as easy as it sounds to get those pictures and words together in a way that makes sense to the rest of the world.  (If you've ever tried, I'm sure you know!)  So today I wanted to share with you how I write my tutorials.  Of course, you can write a tutorial whatever way works best for you.  This is just the way I do it, and I thought it might be helpful to someone out there.  :)  So here we go!

Step 1:  Write the Tutorial

I know it sounds strange to start with the writing, but this is where I begin.  Thinking through a sewing/crafting project before you do it saves you time and mistakes, plus trying to verbalize how to do 
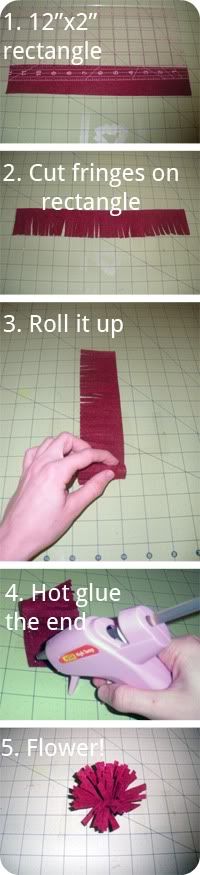
something helps you figure out what pictures you'll need.  When I write my tutorials, I actually write out what pictures I'll need in between the paragraphs.  I put a description of the picture in brackets and highlight it so it's easy to find and replace with a picture later.  So for example, my tutorials look something like this when I first start working on them:


Step 2: Print the Tutorial and Do the Project

After I've written my tutorial, I print it out and follow it as I do my project.  There are a couple of reasons for this.  First, that way I can check off the pictures as I take them and make sure I got the right shots of everything.  And second, it allows me to follow my own tutorial and see if it makes sense!  Almost always I notice things I left out, or things that need more explaining, and I pencil them in.  That usually looks about like this:


Messy, huh?  It's systematic, I swear! :)

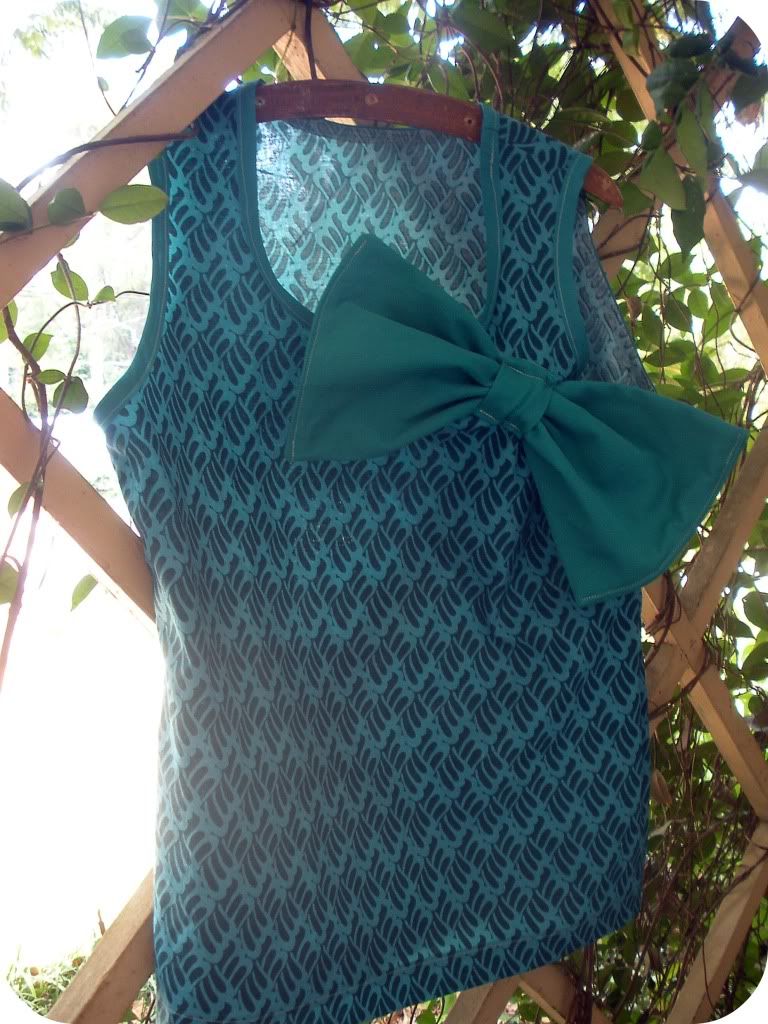
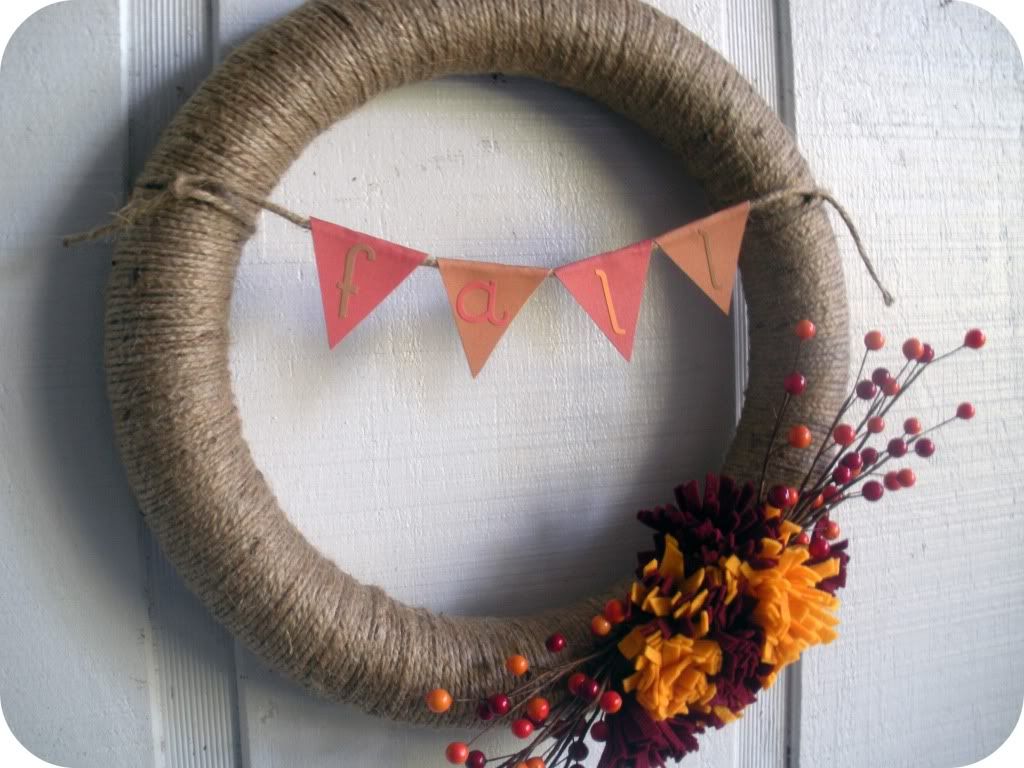
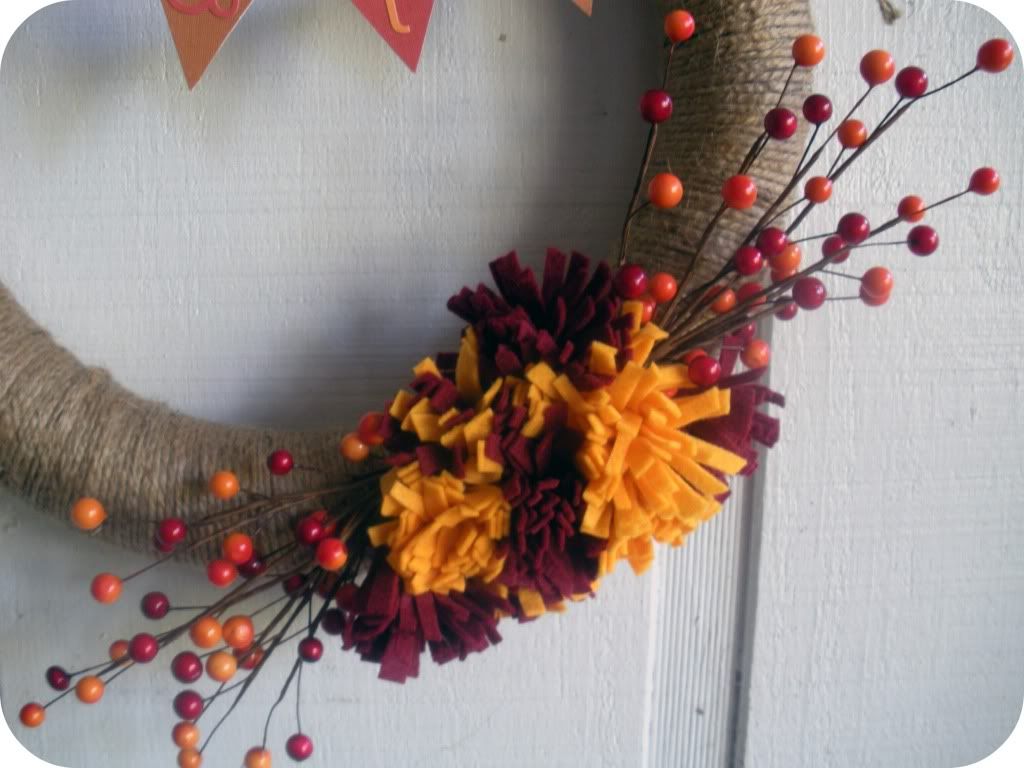
Step 3: Do a Photo Shoot

When the project is finished, I like to do a photo shoot of the final product.  I usually do this outdoors in the middle of the day so that there's plenty of good light.  There are some great tips for taking photos here, and you can visit my blogging tips board on Pinterest for other photography tips.
Image Source.


Step 4: Editing

This is probably the most time consuming step next to actually doing the project--going back and editing your tutorial copy and your photos.  But it's really important, I swear!  It really makes all the difference between a beautiful, easy to follow tutorial and one that no one wants to use!  So reference the print out you wrote all over and fix all the verbiage, then use Photoshop to edit your pictures.  Can't afford or don't know how to use Photoshop?  No worries!  There are plenty of free, easy-to-use online alternatives, like Picnik.com.


Step 5:  Put it All Together on Your Blog!


Now it's time to combine all that copy and all those great photos you edited on your blogging platform.  Be sure to preview your post before publishing it to make sure everything shows up correctly.  If it looks okay, post it!  Ta-da!  Now you've got a great tutorial that everyone will want to use. :)


I hope this information is useful to someone.  And, if not, I ramble to myself all the time anyway, so no big deal!  Haha.

Thanks for stopping by and happy crafting (or blogging, as it may be today)! :)

--CC
Related Posts Plugin for WordPress, Blogger...