
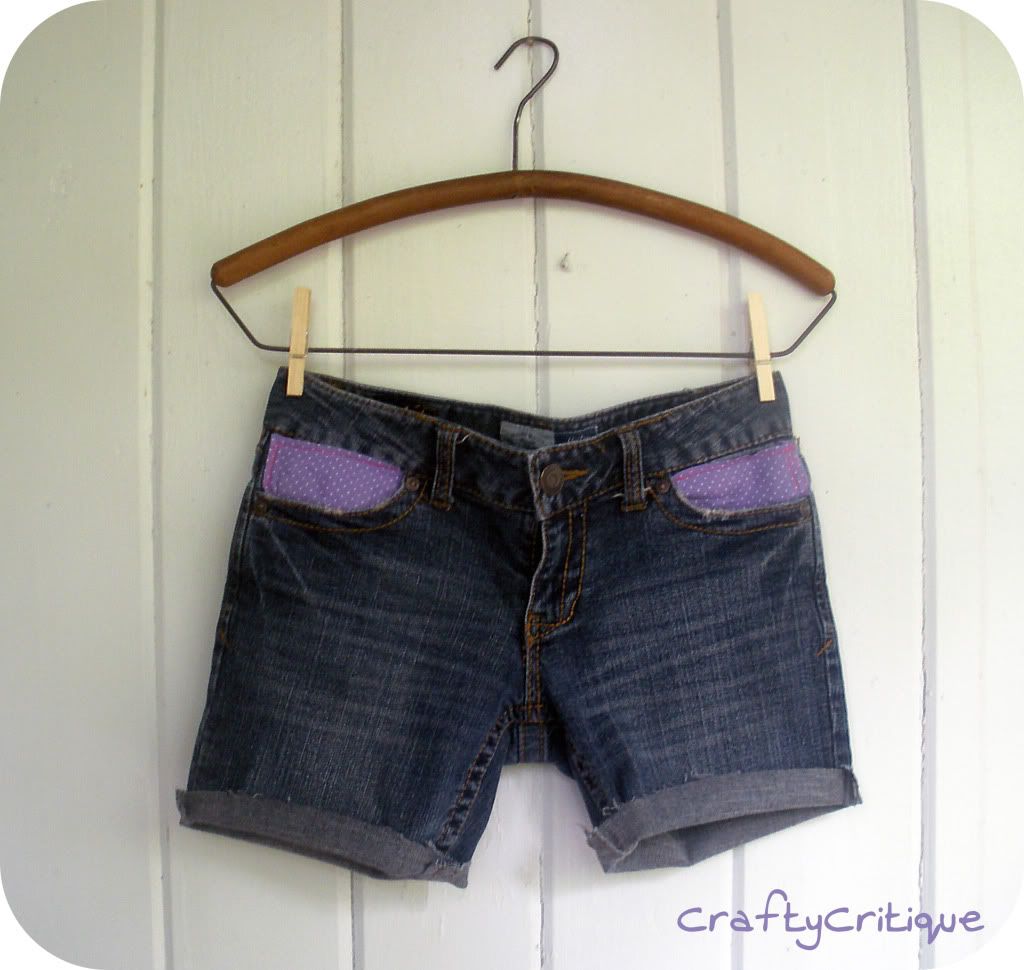
This is another one of those projects that is great for refashioning old kids' jeans. If you know your child's jeans won't fit them by fall, why not turn them into super-cute shorts to wear this summer? (In my case I just hadn't worn these jeans in two years because I don't like flare bottoms, so I turned them into shorts!)

So let's get to it! Follow me after the break for the tutorial!
You will need:
- A pair of jeans to refashion or a pair of denim shorts
- A fat quarter or scrap fabric
- Steam-a-Seam
- Sewing paraphernalia
- Half an hour :)

Step 1: Cut Your Shorts
If you are using a pair of shorts that are pre-made, then just ignore this step. :)
If you are refashioning your shorts from old jeans, start by cutting off the bottom portion of the pant legs. Use a pair of shorts that fits well to determine how long to leave your shorts, or just try them on and cut them off where you think they look good. The great thing about cutting them yourself is that you can make them any length you like from shortie-shorts to bermudas to capri pants!
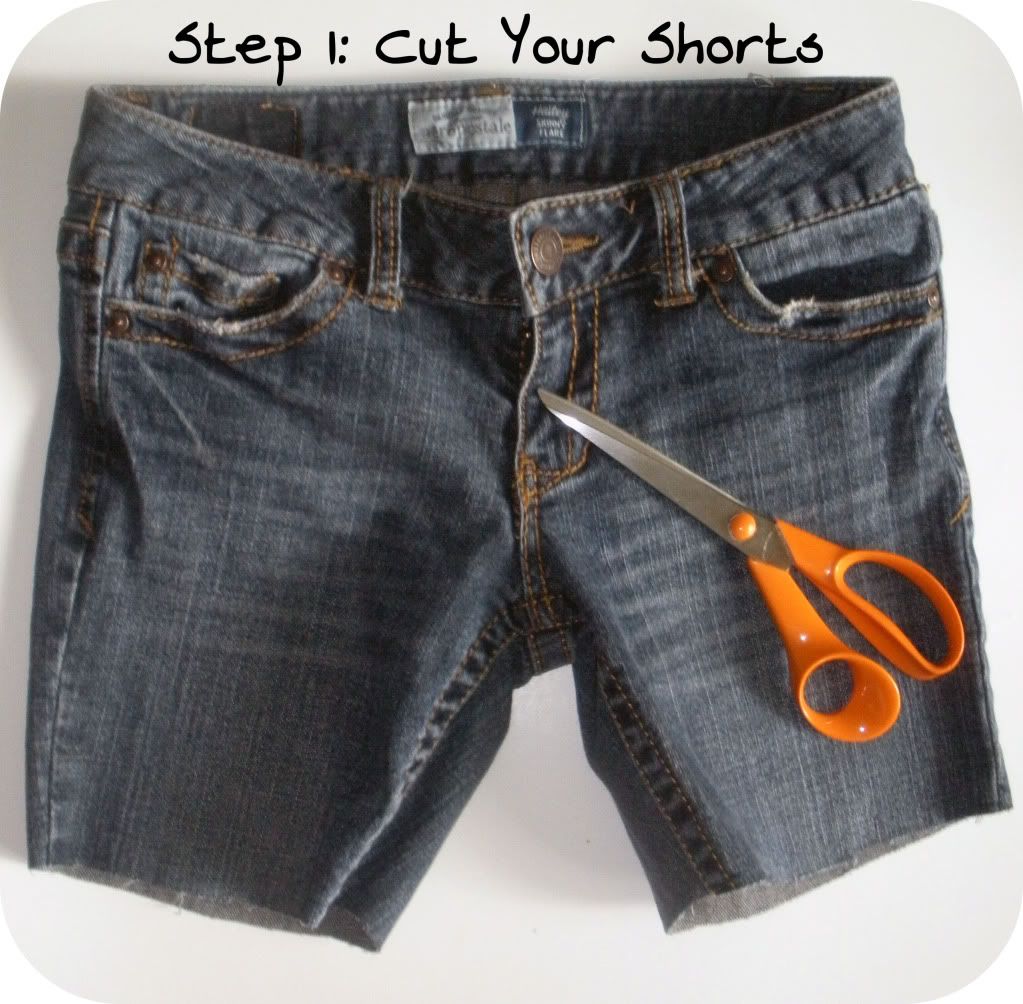
For the hem I wanted a frayed, cut-off look so I didn't finish the bottom, but if you don't like that style, make sure you leave enough extra length to sew a hem. Or instead of a hem, maybe you want to use my knot-no-hem-pants tutorial to make fabric hem that matches your pockets!
Step 2: Make Your Pocket Pattern
Flip your shorts inside out to observe how your pocket is made, then trace the pocket's shape onto wax paper to make a template. Add a 1/4 inch around the edges of your pattern so you'll have enough extra fabric to finish your edges.

For example, my pockets were basically a big square, so I made a square a 1/4 inch larger than the pocket. If your pocket is a different shape, you'll use the same process and just draw a different shape, adding a 1/4 inch for finishing the edges.

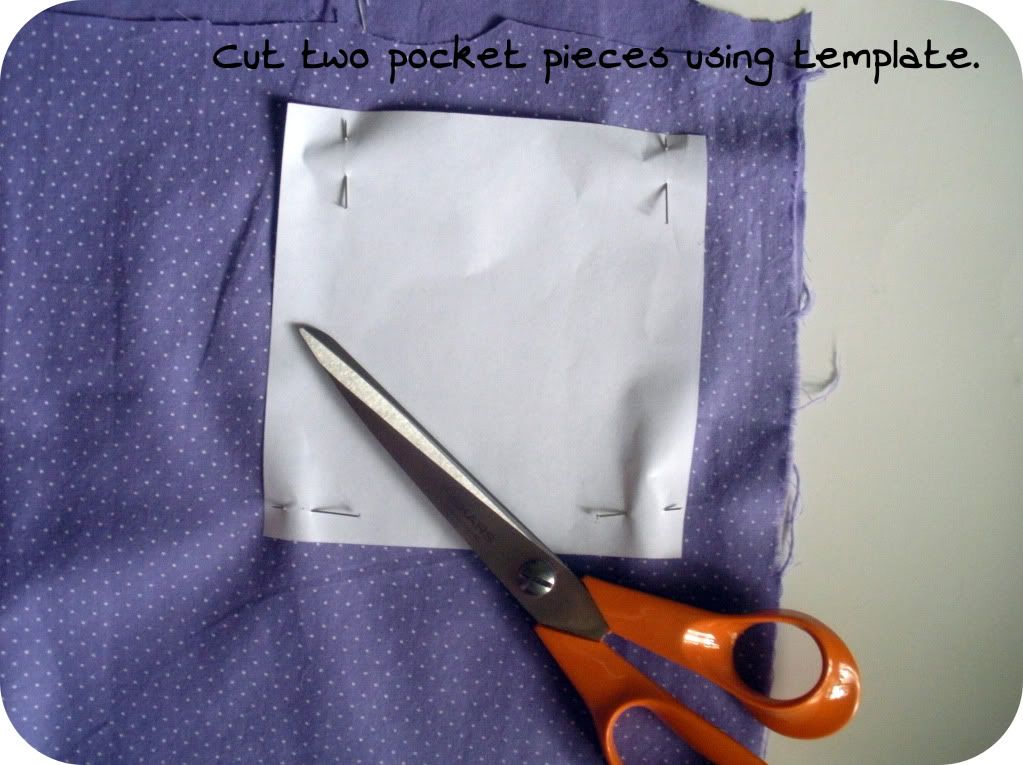
Step 3: Cut Your Fabric
Pin your pocket template onto your fat quarter or scrap fabric and cut out your fabric piece. Make sure to cut two--one for each pocket!
Step 4: Finish the Fabric Edges
Take your fabric and fold each edge under 1/4 inch, press with your iron, and sew in place. This will finish your edges so that your pocket won't start to fray.
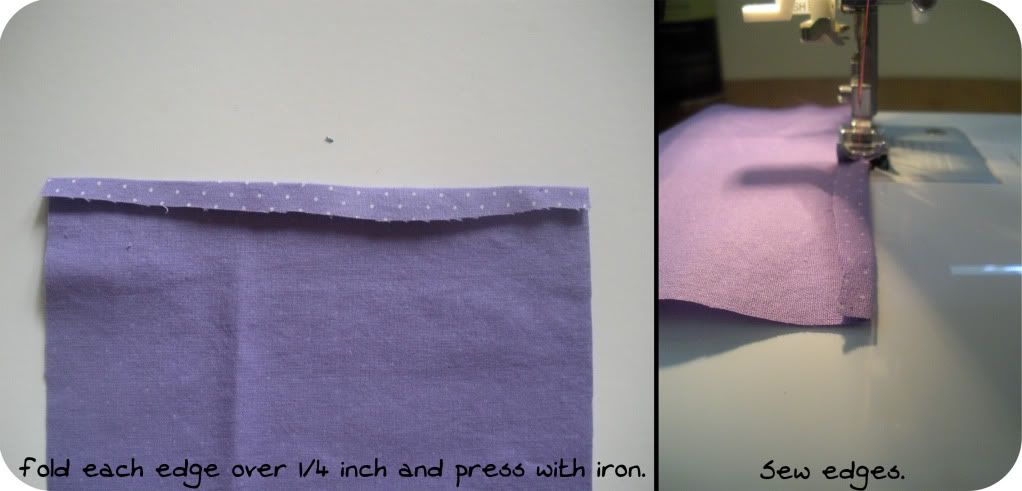
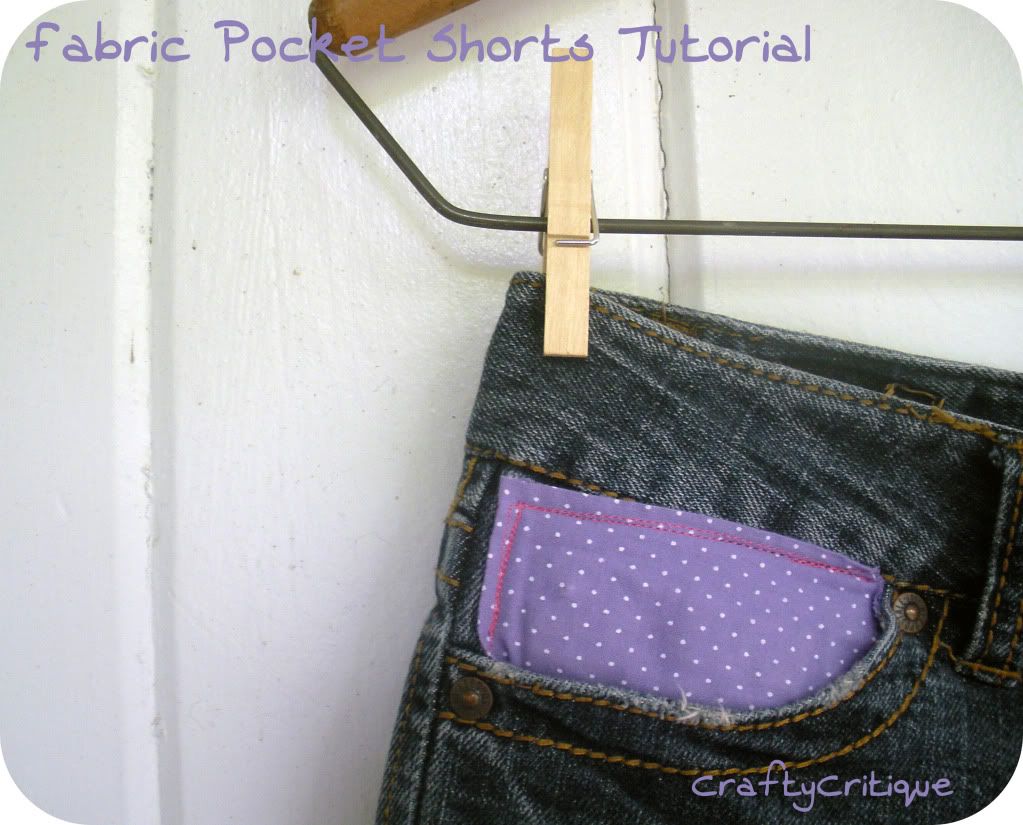
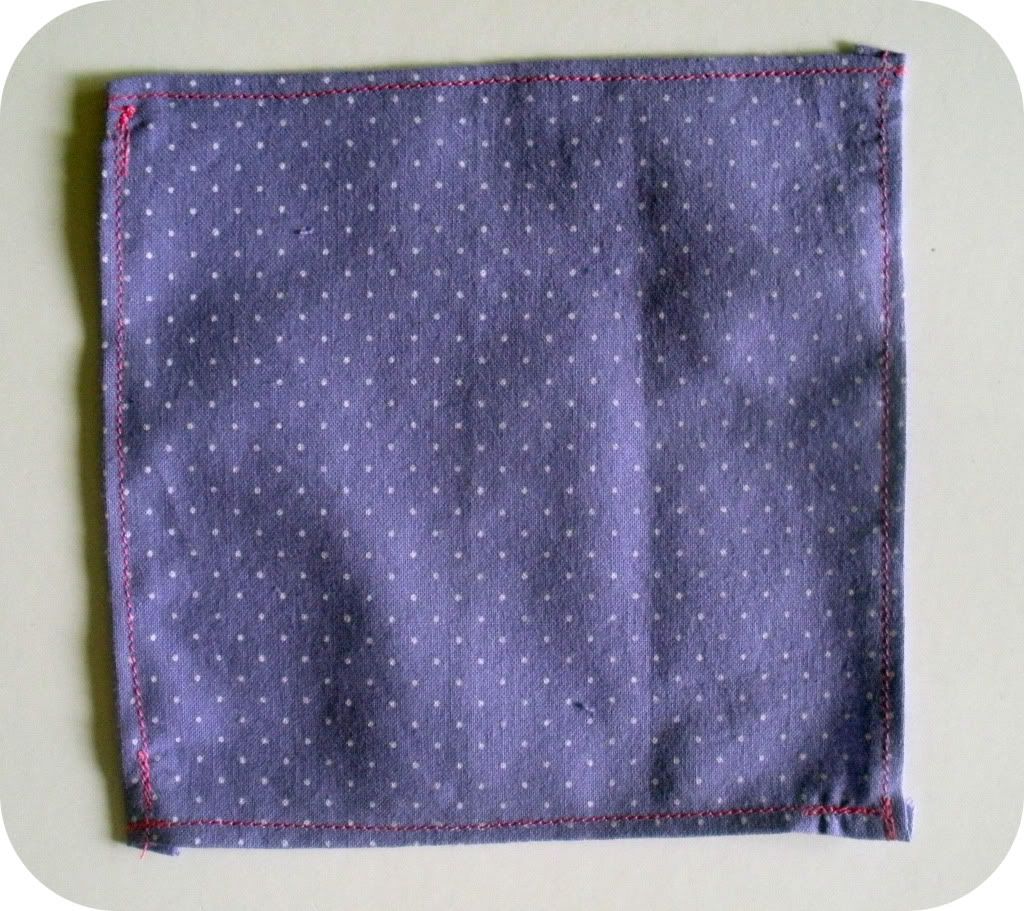
When you've sewn down all four edges, you should have this:
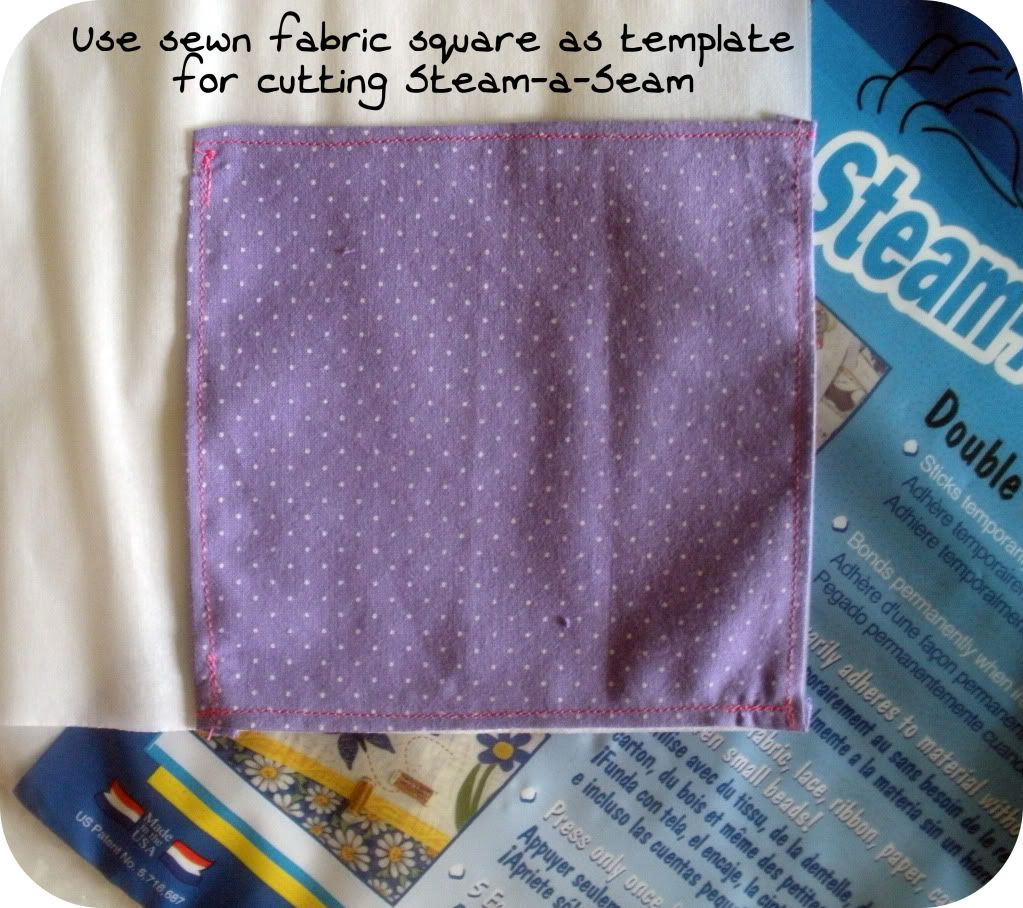
Step 5: Cut Your Steam-a-Seam
Now it's time to cut our Steam-a-Seam! You'll want two pieces of Steam-a-Seam the same size as your sewn fabric pieces (i.e. the original pocket size, not the template with 1/4 inch added). I used my now-sewn fabric pieces as my template for cutting the Steam-a-Seam.
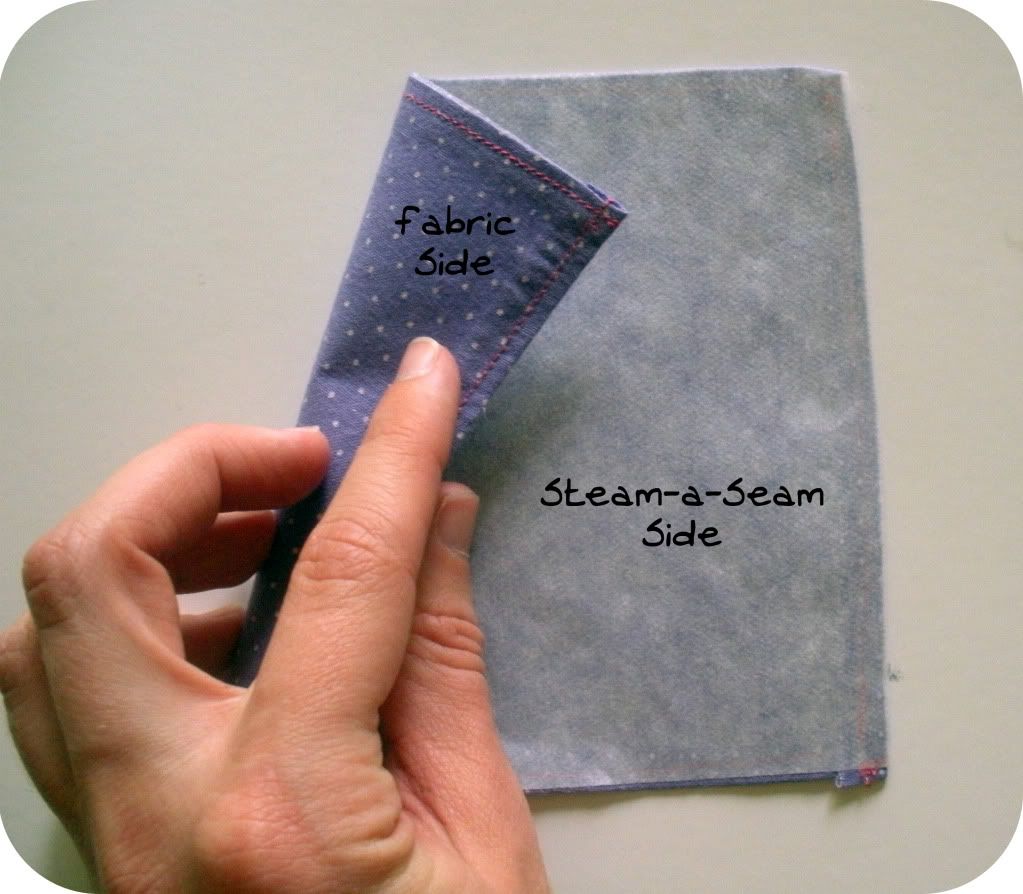
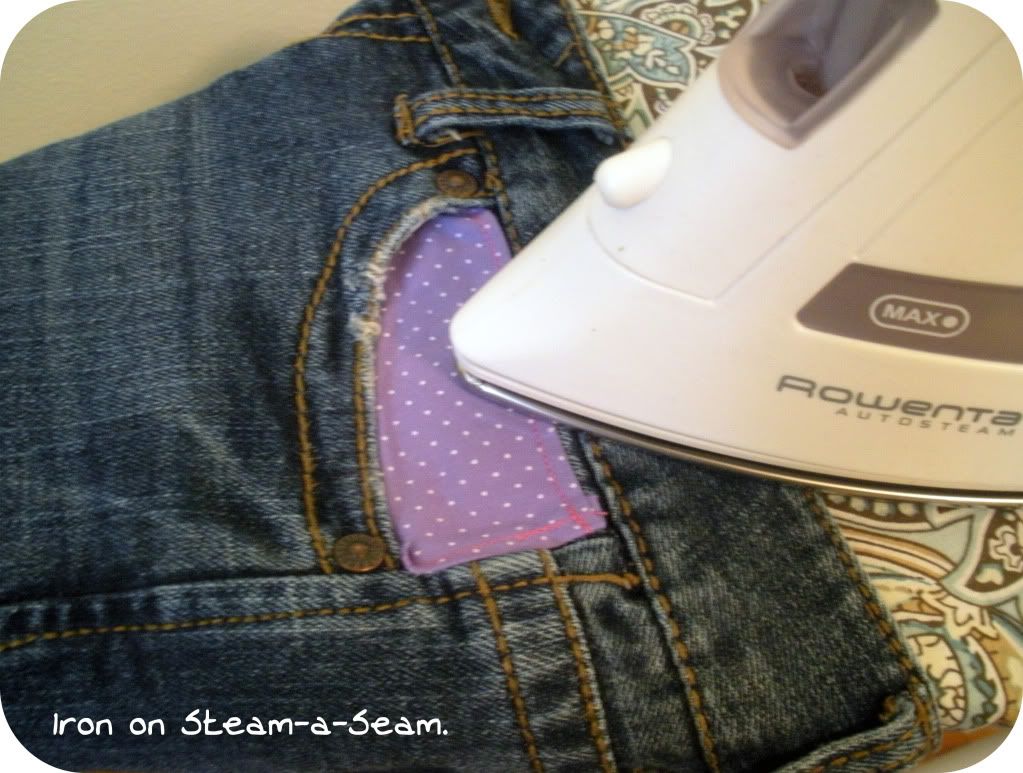
Step 6: Iron on the Fabric
Following the package directions, iron the Steam-a-Seam to the wrong side of your fabric pieces. After the Steam-a-Seam is ironed onto the fabric pieces, you should be able to peel away the other layer of wax paper. You will have this:
Now carefully insert the fabric pieces into your pockets with the adhesive side facing down. This may take some maneuvering, so be patient! I found it helpful to slide the top part of my shorts onto my ironing board to help hold everything still. I also had to snip some of my fabric with my scissors to help it lie down flat around the buttons at the top and bottom part of the pocket. You'll probably need to do this as well. :)

Once you get your fabric laying flat inside the pocket, use your iron to adhere the Steam-a-Seam to your shorts.
Step 7: Top Stitch Your Fabric
Almost there! For durability in the washing machine, I top stitched along the parts of the fabric that could be seen outside of the pocket. Be careful not to sew the front and back of your shorts together or to sew your pocket shut! It's also possible (and honestly may be easier) to sew this part by hand.

Finito!

Now you have awesome shorts with embellished fabric pockets. Wear them proudly!
 |
| Psst! Ruffled necklace tutorial found here. |
Until next time, happy crafting!
--CC
Hello crafty Madison! I'd love to have you post these over at a linky party I happen to by co-hosting. These are adorable and the tutorial is great! Come and share it: http://sunnyvanilla.blogspot.com/2012/05/co-host-linky-party-with-lines-across_13.html
ReplyDeletetake care,
jen
sunnyvanilla.blogspot.com
These are so cute! Thanks for the great tutorial. I would love if you would share this and any other posts at Showcase Your Talent Thursday http://whatscookinglove.blogspot.com/2012/05/showcase-your-talent-thursday-7.html. I hope to see you there!
ReplyDelete