Long time no see! 2014 has been a busy year, which is why I haven't posted in so long! Let's see...the fiance graduated law school, we moved across the country, I interviewed for 20+ jobs (no exaggeration!), started a new job, and I'm ridiculously busy with wedding planning...so you can imagine why I haven't posted in awhile. :)
But! I have a ton of cool DIY wedding projects that I will hopefully be sharing here in a month or so after the wedding, which is fast approaching. And I wanted to stop in today and share a before and after picture of this cool mantle I picked up antiquing.
Since we moved, we no longer have a fireplace in our apartment, which made me sad since I love decorating it for each season. So when I saw this (beat up) mantle at an antique store, I decided to buy it and paint it with white chalk paint!
If you've never used chalk paint before, I highly recommend it. Normally I hate painting, but the chalk paint made it so easy and quick! I wanted a distressed look to match these antique molding pieces we hang as art in our house, and the chalk paint was the best paint I could have chosen.
There's no sanding or prepping involved. You slap a coat or two of the chalk paint right onto any surface, wait 20-30 minutes for it to dry (no kidding!), sand the edges a little to rough it up (only if you want), and then rub on this special wax with a white t-shirt, which helps give it that distressed look and also seals the paint so it doesn't rub off.
We finished the entire project in about two hours.
We hung the mantle on the wall with a picture hanging kit for really heavy photos (75 pounds and up). We didn't nail into the studs so I'm hoping it doesn't fall over. I'll let you know if it does I guess!
Nice and simple, and turned out lovely! My kind of project. :)
Monday, September 1, 2014
Sunday, December 15, 2013
Christmas Cookie Exchange Party
This past Saturday we had our annual Christmas cookie exchange party. I have to say I was slacking a little bit because I didn't even tie any ribbons around the wine glasses or get out the paper straws like I did last year. Ha!
Everyone brought delicious cookies. We had hot cocoa cookies, gooey butter cookies, M&M and chocolate chip cookies, chocolate chip with pecan, Oreo brownies, peanut butter bars, and our cookies...
We made double chocolate cheesecake cookies with mascarpone glaze piped on top (recipe from How Sweet It Is). They weren't quite as cheese cake tasting as I had hoped, but they were just the right balance of chocolate and they were moist and chewy, so we loved them.
P.S. Sorry I didn't take more pictures of everyone's cookies...we were trying to keep the new puppy from eating everything in sight. :)
We also made the cream cheese and cucumber crostinis again like we did at our housewarming party (in addition to other things). This time I switched out the plain cream cheese and Italian dressing mixture for onion and chive cream cheese. It was easier to make and I actually liked it better.
It was also a goodbye party for our friend Allison, who just got a new job in Missouri. Since it was her last party with us, we played Apples to Apples, which is a tradition for parties at our house. (Oh, and the animal babies joined in, too.)
And of course we had to get a good group photo. :)
We had a great time. The best part of Christmas is spending time with friends and family, so I'm glad we've made this an annual tradition to help us enjoy the season. :)
Hope your Christmas is just as bright!
--CC
Everyone brought delicious cookies. We had hot cocoa cookies, gooey butter cookies, M&M and chocolate chip cookies, chocolate chip with pecan, Oreo brownies, peanut butter bars, and our cookies...
We made double chocolate cheesecake cookies with mascarpone glaze piped on top (recipe from How Sweet It Is). They weren't quite as cheese cake tasting as I had hoped, but they were just the right balance of chocolate and they were moist and chewy, so we loved them.
| Double Chocolate Cheesecake Cookies with Mascarpone Glaze |
We also made the cream cheese and cucumber crostinis again like we did at our housewarming party (in addition to other things). This time I switched out the plain cream cheese and Italian dressing mixture for onion and chive cream cheese. It was easier to make and I actually liked it better.
It was also a goodbye party for our friend Allison, who just got a new job in Missouri. Since it was her last party with us, we played Apples to Apples, which is a tradition for parties at our house. (Oh, and the animal babies joined in, too.)
![]() |
| Apples to Apples! :) |
We had a great time. The best part of Christmas is spending time with friends and family, so I'm glad we've made this an annual tradition to help us enjoy the season. :)
Hope your Christmas is just as bright!
--CC
Saturday, December 14, 2013
Bean Soup Mix in Mason Jars
My Christmas shopping is just about done and I can officially say I bought nothing at the mall this year. :) I stuck to Etsy, Amazon, local small business, and my personal favorite--DIY!
Every year I like to make something edible that I can give to my assistant at work and my grandpa/other people who are hard to buy for. This year I tried out this great Five Bean Vegetarian Soup Mix recipe from Back to Her Roots.
The tutorial called for a quart size jar, but I bought pint sized and cut the recipe in half. Of course, this required me to use the very sophisticated program Microsoft Paint to fix the instructions on the printable. But it did save me some money, so I got to make a lot more gifts. :)
I also trimmed the budget by using washi tape I already had for the spice packets instead of buying labels. All in all the project cost about $2.50 per gift. Not too shabby! And I love the way the turned out. My favorite part is the layers of colorful beans.
I hope you're wrapping up your holiday crafting and enjoying the season! If you need some last minute ideas, stop by this post and check out my suggestions. Until next time, happy crafting!
Friday, December 13, 2013
Oh Christmas Tree
Just wanted to stop in and share a few pictures of our furry animal babies by the Christmas tree. Still working on getting that perfect shot, but these aren't too bad. Good enough for a Christmas card, I'd say! Hope you're enjoying the holiday season!
Monday, December 9, 2013
5 Out-of-the-Ordinary DIY Christmas Gifts It's Not Too Late to Make

With the holidays fast approaching, I thought I'd stop in to share five unique handmade gifts that are quick and easy. That means there's still time to make them! Links and descriptions are below. Enjoy!
Wednesday, December 4, 2013
No Sew Fleece Blanket for Puppy
A couple weekends ago I made a second no-sew fleece blanket for our puppy Sterling. He likes to go swimming in the pond then take naps on his blanket. Needless to say it often stinks, so I made him a second blanket he can sleep on while the other is in the wash.
I found some great fleece fabric at Jo-Ann's that says "Super Dog Bow-Wow!" Adorable! Plus it was 50% off. :) I paired it with some red polka-dot fabric because I thought it looked comic bookish. My puppy loved it.
![]() |
| Sterling loves his no-sew fleece blanket, and the selvage I cut off the edges... |
Wondering how to make your own blanket? It's easy as pie and quite relaxing. The instructions are after the break. (Sorry, no photos yet. I'll add them next time I make a blanket!)
Saturday, November 30, 2013
Happy Belated Thanksgiving!
Happy belated Thanksgiving! I think this year was our best year yet. We had plenty of good food, friends, and pie! Nothing even boiled over. :)
I was very proud of my table. I made a centerpiece with a clear vase, a bag of cranberries, and a floating candle and swiped up a tablecloth at Target.
Then we got cooking and eating. Among traditional fare, I made our teriyaki bacon wrapped green bean bundles again and tried this amazing recipe for ranch carrots. :)
And in holiday tradition, I made everyone take a group photo.
By the way, it wasn't so easy to get a shot of the new puppy...
I hope you had a fantastic Thanksgiving as well!
--CC
I was very proud of my table. I made a centerpiece with a clear vase, a bag of cranberries, and a floating candle and swiped up a tablecloth at Target.
Then we got cooking and eating. Among traditional fare, I made our teriyaki bacon wrapped green bean bundles again and tried this amazing recipe for ranch carrots. :)
![]() |
| Why, yes, that is an apple crisp cheesecake that my lovely fiance made. |
And in holiday tradition, I made everyone take a group photo.
By the way, it wasn't so easy to get a shot of the new puppy...
I hope you had a fantastic Thanksgiving as well!
--CC
Sunday, October 27, 2013
Pumpkin Carving Party 2013
Just popping in to share a few photos from our annual pumpkin carving party. I know Halloween isn't typically considered a part of "the holidays", but to me it's the kickoff. Every year we like to gather a group of friends to carve and decorate pumpkins on the Saturday before Halloween. This year was our best year yet! We had a great turnout, we ate a lot of hors d'oeuvres and pumpkin chocolate chip cookies, an had a decent amount of wine and hard cider. Plus I got to fill the house with fall decorations and enjoy decorating pumpkins!
We had a great time and now I can't wait for my fiance's birthday in mid-November, Thanksgiving, and Christmas. I'm already dreaming up (and pinning) DIY gifts for Christmas, and next weekend I get to make another stocking for the newest member of our family...
Meet Sterling, our precious (read: rambunctious) new puppy. I'll hopefully be checking back in with you again soon but I can't make promises since we're hard at work planning our wedding right now! If I don't talk to you soon, happy crafting! :)
We had a great time and now I can't wait for my fiance's birthday in mid-November, Thanksgiving, and Christmas. I'm already dreaming up (and pinning) DIY gifts for Christmas, and next weekend I get to make another stocking for the newest member of our family...
Meet Sterling, our precious (read: rambunctious) new puppy. I'll hopefully be checking back in with you again soon but I can't make promises since we're hard at work planning our wedding right now! If I don't talk to you soon, happy crafting! :)
Sunday, August 4, 2013
Housewarming Party Appetizer Menu
Howdy! :) It's been awhile since I've been able to squeeze in time for a blog post because we've been moving, but we're finally getting settled. Last weekend I finally got my craft room unpacked and even sewed some dog collar bandannas for our new puppy that will be coming home soon!
This weekend we threw a small housewarming party and I wanted to stop by to share this great recipe I found on Pinterest for Italian Cucumber Appetizers from High Heels & Grills.
What I loved most about these appetizers was that they were so simple to put together, but they look super fancy (almost like a little crostini). They're also very inexpensive for the number of appetizers they make. I'll definitely be bringing them to pot lucks in the future.
To save time, I mixed the cream cheese and Italian dressing a few hours before the party and put it in the fridge, so all I had to do was toast the baguette slices and assemble the three ingredients (baguette, cream cheese, and cucumber slices) about a half hour before the party.
Add a few bottles of wine, some hummus and veggies, and a cheese and fruit board and you have yourself a plentiful and fresh summer hors d'oeuvres menu that doesn't require any cooking or heat from the oven. (Oh, and in case you thought I was too healthy, we also had BBQ meatballs in the crockpot and a dozen cupcakes to eat. Mwahaha!)
Hope you had a fantastic weekend. Hopefully I'll be posting some sewing projects again soon!
Happy Crafting!
This weekend we threw a small housewarming party and I wanted to stop by to share this great recipe I found on Pinterest for Italian Cucumber Appetizers from High Heels & Grills.
| Italian Cucumber and Cream Cheese Crostini Appetizers |
What I loved most about these appetizers was that they were so simple to put together, but they look super fancy (almost like a little crostini). They're also very inexpensive for the number of appetizers they make. I'll definitely be bringing them to pot lucks in the future.
| Italian Cucumber and Cream Cheese Crostinis |
To save time, I mixed the cream cheese and Italian dressing a few hours before the party and put it in the fridge, so all I had to do was toast the baguette slices and assemble the three ingredients (baguette, cream cheese, and cucumber slices) about a half hour before the party.
Add a few bottles of wine, some hummus and veggies, and a cheese and fruit board and you have yourself a plentiful and fresh summer hors d'oeuvres menu that doesn't require any cooking or heat from the oven. (Oh, and in case you thought I was too healthy, we also had BBQ meatballs in the crockpot and a dozen cupcakes to eat. Mwahaha!)
| Pita crackers, broccoli, carrot sticks, and roasted red pepper hummus |
| Gouda, cheddar, and baguette slices with Granny Smith Apples and red grapes |
| Brie and Granny Smith Apple Slices |
Happy Crafting!
Monday, May 27, 2013
DIY Pastel Colored Denim Refashion
Back in the early spring I bought a mint colored pair of skinny jeans at LOFT. I loved them, and I wanted another pair in lavender. I couldn't find quite the shade I wanted so I started thinking to myself, "I'm crafty. Why not make them myself?" So I grabbed a pair of jeans I already had on hand that fit well but I never liked the wash, and I bleached them and dyed them purple. This is what I came up with:
Step 1: Bleach Your Jeans in a Bleach/Hot Water Mixture
What I can say about this project is that it's not necessarily hard, but it sure takes patience! I read a lot of tutorials online to try and figure out how long to bleach jeans until they're white and got a lot of conflicting information. From what I can determine, the amount of time needed to bleach the jeans white varies based on how dark the wash on your jeans is, on what material the denim is made of, etc. My jeans took about 6 hours to bleach to (almost) white.
The bleach to water ratio also varies from project to project. I originally tried to use 3 cups of bleach with the water half full in one of those big plastic tubs for soda that you get at Target or Walmart. This turned out not to be enough bleach, so I kept adding bit by bit until I started to achieve some results. Also make sure the water you're using is HOT. It really helps. :)
As your bleaching the jeans, make sure you stir periodically. The jeans will want to float a bit, so stirring them will make sure they're getting bleached evenly. Do not use a kitchen utensil--I used my tongs and it ruined them. Whoops!
One last note about the bleaching process--my jeans never got completely white before the bleach started eating away at the fabric. They were sort of splotchy and greenish white at this point, but rather than let the bleach eat away at the fabric I decided to remove them. I was worried this would make them dye unevenly, but it didn't cause any problems. So get your jeans as white as you can, but don't worry if they're not perfect.
Step 2: Wash Your Jeans
After your jeans are as white as you can get them, run them through a normal wash with soap in your washing machine to wash out the bleach.
Step 3: Dye Your Jeans
Did you know you're not limited to the colors on the shelf when you choose your dye? I used the RIT color dye guide to choose my color. It used just a tiny amount of dye--1/8 tsp. purple and 1/8 tsp royal blue--to get the super light lavender color I was dreaming of. It may not seem like the dye bath is dark enough if you're dying a pastel color, but resist the urge to add more dye to the bath! Remember how long it took to get your jeans white? It only takes 30 minutes to dye your jeans, so worst case you can dye them a shade darker once finished. :)
Once you've chosen your color, mix the dye with hot water and 1 cup salt. Put your jeans in and stir constantly for 30 minutes. I set a timer and watched an episode of Pawn Stars while dying my jeans. The time flew by before I knew it.
Step 4: Give Your Jeans a Final Wash
After your 30 minutes in the dye bath is up, rinse your jeans and put them in your washing machine on a normal cycle with soap. Dry them, and you're (finally) done! :)
I noticed after I got my jeans out that there were a few boo-boos. The seams didn't dye as well at the top, so I'll wear the jeans with a longer shirt. Also, where the bleach ate away at the jeans a little the fabric absorbed more color, but that kind of gives the jeans character.
Step 1: Bleach Your Jeans in a Bleach/Hot Water Mixture
What I can say about this project is that it's not necessarily hard, but it sure takes patience! I read a lot of tutorials online to try and figure out how long to bleach jeans until they're white and got a lot of conflicting information. From what I can determine, the amount of time needed to bleach the jeans white varies based on how dark the wash on your jeans is, on what material the denim is made of, etc. My jeans took about 6 hours to bleach to (almost) white.
The bleach to water ratio also varies from project to project. I originally tried to use 3 cups of bleach with the water half full in one of those big plastic tubs for soda that you get at Target or Walmart. This turned out not to be enough bleach, so I kept adding bit by bit until I started to achieve some results. Also make sure the water you're using is HOT. It really helps. :)
As your bleaching the jeans, make sure you stir periodically. The jeans will want to float a bit, so stirring them will make sure they're getting bleached evenly. Do not use a kitchen utensil--I used my tongs and it ruined them. Whoops!
One last note about the bleaching process--my jeans never got completely white before the bleach started eating away at the fabric. They were sort of splotchy and greenish white at this point, but rather than let the bleach eat away at the fabric I decided to remove them. I was worried this would make them dye unevenly, but it didn't cause any problems. So get your jeans as white as you can, but don't worry if they're not perfect.
Step 2: Wash Your Jeans
After your jeans are as white as you can get them, run them through a normal wash with soap in your washing machine to wash out the bleach.
Step 3: Dye Your Jeans
Did you know you're not limited to the colors on the shelf when you choose your dye? I used the RIT color dye guide to choose my color. It used just a tiny amount of dye--1/8 tsp. purple and 1/8 tsp royal blue--to get the super light lavender color I was dreaming of. It may not seem like the dye bath is dark enough if you're dying a pastel color, but resist the urge to add more dye to the bath! Remember how long it took to get your jeans white? It only takes 30 minutes to dye your jeans, so worst case you can dye them a shade darker once finished. :)
Once you've chosen your color, mix the dye with hot water and 1 cup salt. Put your jeans in and stir constantly for 30 minutes. I set a timer and watched an episode of Pawn Stars while dying my jeans. The time flew by before I knew it.
Step 4: Give Your Jeans a Final Wash
After your 30 minutes in the dye bath is up, rinse your jeans and put them in your washing machine on a normal cycle with soap. Dry them, and you're (finally) done! :)
I noticed after I got my jeans out that there were a few boo-boos. The seams didn't dye as well at the top, so I'll wear the jeans with a longer shirt. Also, where the bleach ate away at the jeans a little the fabric absorbed more color, but that kind of gives the jeans character.
My final words of wisdom about this project--it's not perfect. Expect your jeans to have a few flaws, but know that you're getting a trendy piece to add to your wardrobe for a fraction of what you would have paid in the store. (Since I already had these jeans on hand this project cost me about $3 for the dye.) Don't be intimidated because it really is easy--it just takes a bit of time! So if you've got some patience, give it a try! :)
Happy crafting!
Thursday, May 23, 2013
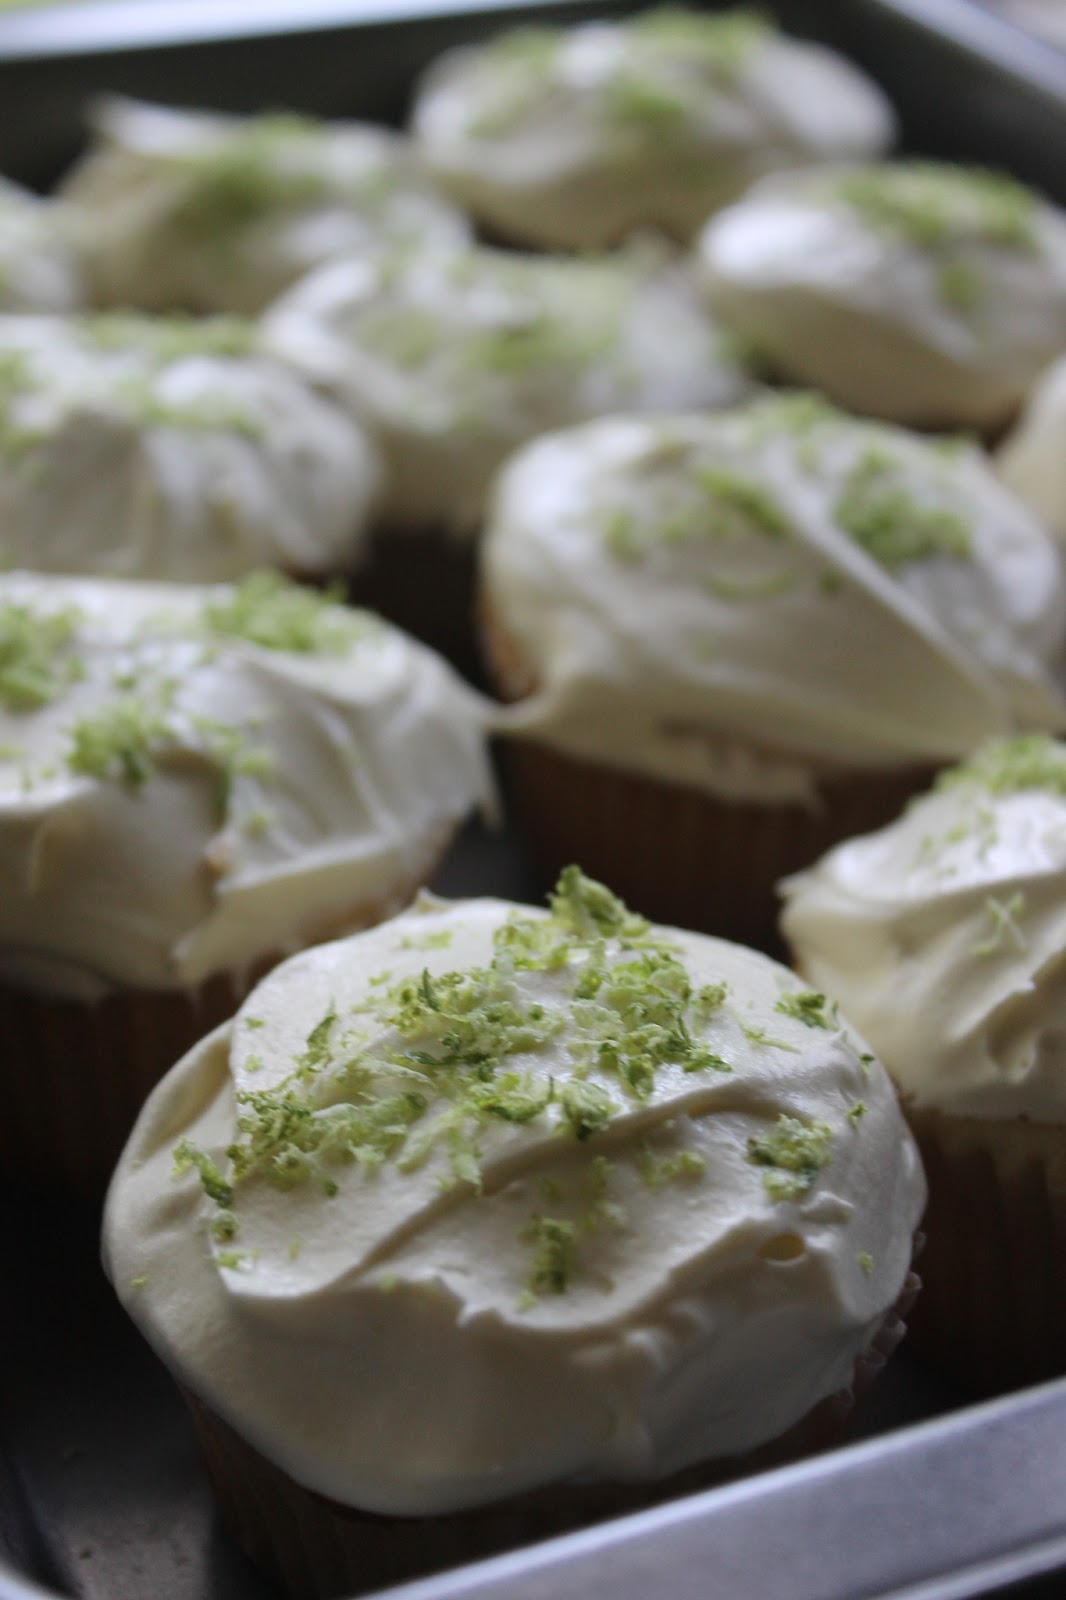
Key Lime Cupcakes with Vanilla Cool Whip & Pudding Frosting Recipe
This week I helped an old friend celebrate her 25th birthday by baking her some delicious key lime cupcakes. (I actually used regular limes though. Shh! Don't tell!)
I chose a cool whip and vanilla pudding frosting because 1) I've seen everyone ranting and raving about it on Pinterest and 2) I thought the light, airy frosting would be the perfect compliment to such a fruity, summery cake.
I thought the frosting might not hold up well and slide off the cake, but it actually holds up quite nicely. I guess that's the pudding doing its work. :)
I zested some of the leftover limes and sprinkled it on top to give the cupcakes a little color and extra zing. They were to die for! I loved this recipe.
The recipe actually made a little bit extra batter, so I filled a bread pan with the leftovers. I cut the thin rectangular cake in half and made it into a tiny square layer cake for the birthday girl. I decorated the top with a half slice of lime.
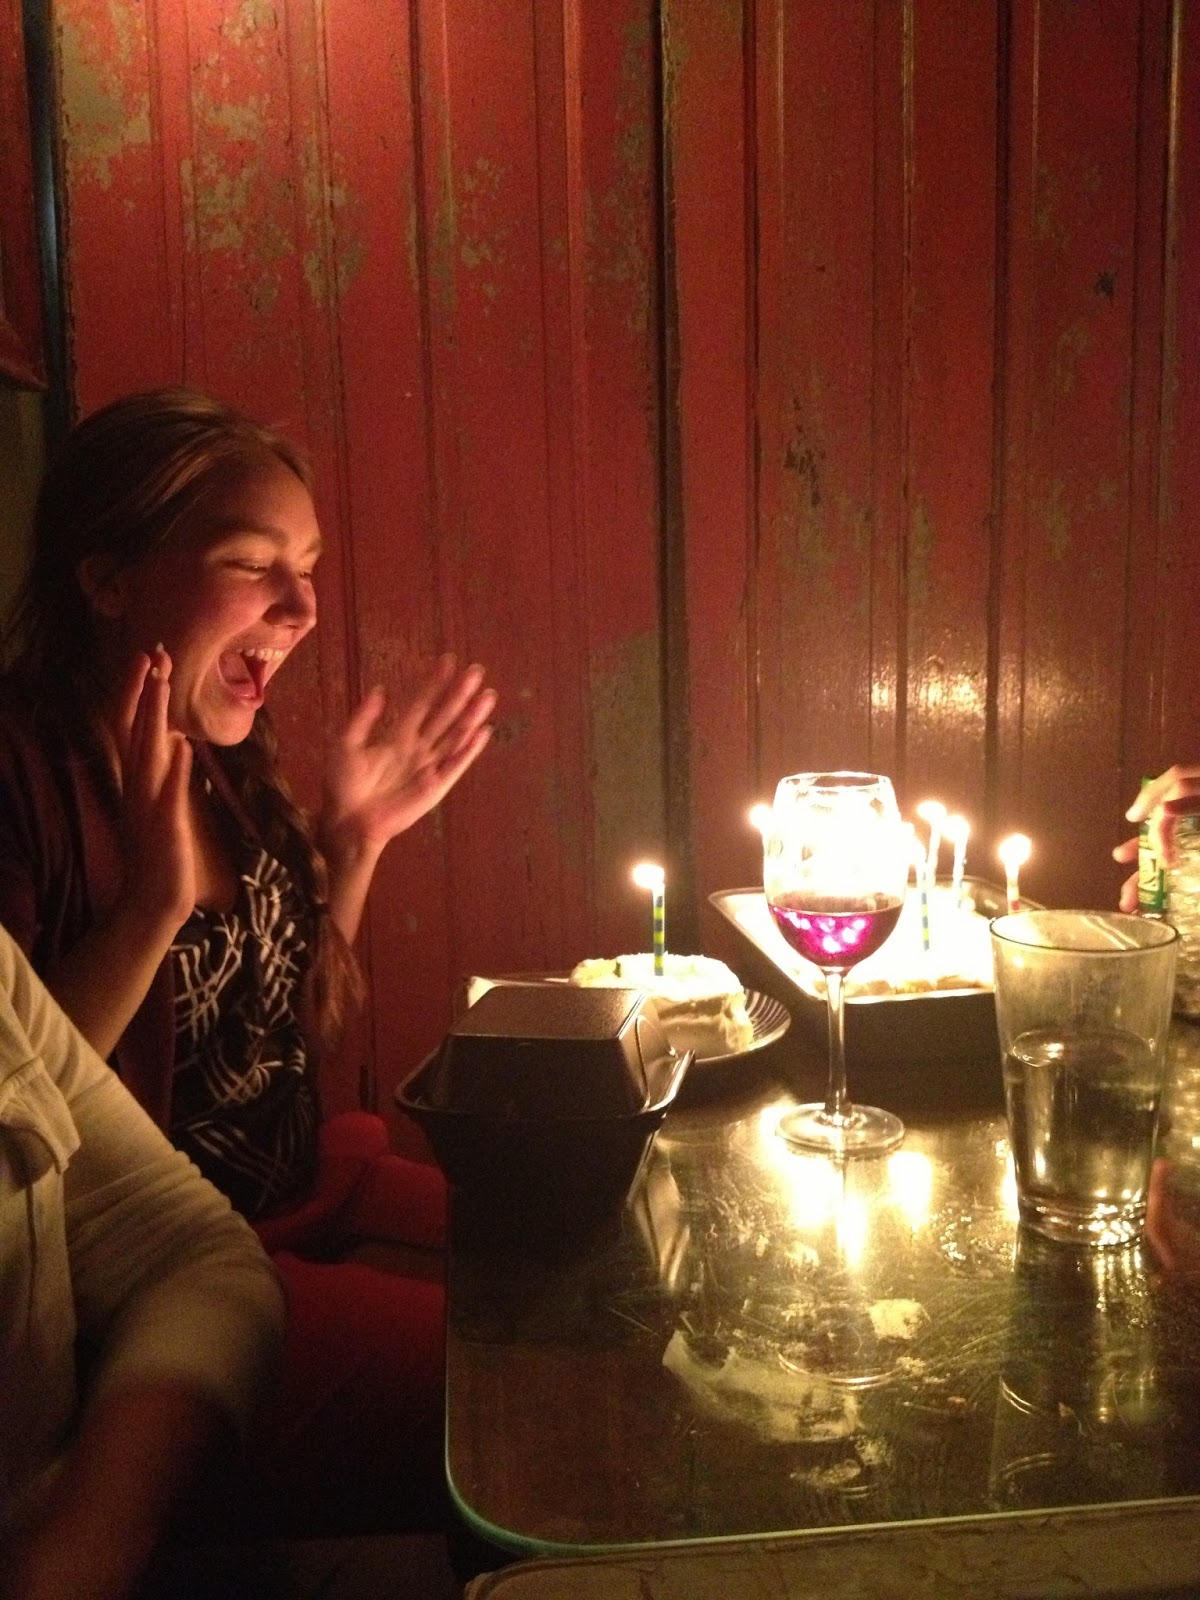
We took the cake to a local Italian restaurant and enjoyed it with wine after a nice dinner with friends. The look on my friends face before she blew out the candles says it all. This is totally why I love crafting, baking, and all things homemade. :)
If you'd like to try the recipe out yourself (which I highly recommend you do!), the recipe is below. (You can also find the original recipe for the cupcakes at My Madison Bistro here.) Enjoy!
I chose a cool whip and vanilla pudding frosting because 1) I've seen everyone ranting and raving about it on Pinterest and 2) I thought the light, airy frosting would be the perfect compliment to such a fruity, summery cake.
I thought the frosting might not hold up well and slide off the cake, but it actually holds up quite nicely. I guess that's the pudding doing its work. :)
I zested some of the leftover limes and sprinkled it on top to give the cupcakes a little color and extra zing. They were to die for! I loved this recipe.
The recipe actually made a little bit extra batter, so I filled a bread pan with the leftovers. I cut the thin rectangular cake in half and made it into a tiny square layer cake for the birthday girl. I decorated the top with a half slice of lime.
We took the cake to a local Italian restaurant and enjoyed it with wine after a nice dinner with friends. The look on my friends face before she blew out the candles says it all. This is totally why I love crafting, baking, and all things homemade. :)
If you'd like to try the recipe out yourself (which I highly recommend you do!), the recipe is below. (You can also find the original recipe for the cupcakes at My Madison Bistro here.) Enjoy!
Key Lime Cupcakes
adapted from Bon Appetit, Sept 2008
1 ¾ cups cake flour
½ teaspoon baking powder
½ teaspoon baking soda
½ teaspoon salt
1 stick (1/2 cup) cool unsalted butter, cut into 8 pieces
1 ¼ cups granulated sugar
2 large eggs (room temperature)
2 ½ tablespoons key lime juice
1 tablespoon key lime zest
1 drop green food coloring paste
¾ cup buttermilk (room temperature)
½ teaspoon baking powder
½ teaspoon baking soda
½ teaspoon salt
1 stick (1/2 cup) cool unsalted butter, cut into 8 pieces
1 ¼ cups granulated sugar
2 large eggs (room temperature)
2 ½ tablespoons key lime juice
1 tablespoon key lime zest
1 drop green food coloring paste
¾ cup buttermilk (room temperature)
Preheat oven to 350*F. Line a muffin tin with 12 paper liners.
Sift the cake flour, baking powder, baking soda, and salt three times, set aside.
Using a mixer fitted with the paddle attachment, beat the butter on low until it’s softened a bit. Add the sugar and increase the speed to medium. Beat until fluffy, about four minutes. Add one egg at a time, beating well after each addition. Add the lime juice, zest, and food coloring and beat until mixed. (The mixture will look curdled.)
Add the flour in three additions, alternating with the buttermilk, beginning and ending with the flour, scraping down the bowl as necessary. Mix on low until just combined. Fill each cupcake liner 2/3 full.
Bake 20-25 minutes. Cool completely and frost with cream cheese icing.
Makes 12-14 cupcakes.
Cool Whip Vanilla Pudding Frosting
1 8oz container Cool Whip or whipped topping
1 package Vanilla (or any flavor) instant pudding mix
1 cup milk
1 package Vanilla (or any flavor) instant pudding mix
1 cup milk
In a medium bowl, combine pudding mix with milk. Whisk until smooth and thickened. Fold in container of Cool whip until thoroughly mixed. Spread over cake.
Subscribe to:
Posts (Atom)