Wednesday, March 9, 2011

St. Patrick's Day Tutorial Roundup

St. Patrick's Day is just one week away now, but in case you're still searching for last-minute decorating or school party ideas, I've put together a list of great St. Patrick's Day craft tutorials for you!  Click on any image to be linked to the tutorial.

Of course, I've already shared my Shamrock Flag and Kirstikoo's St. Patrick's Day Garland with you, but Kirstikoo also has a great Shamrock Canvas Art tutorial you could display along with your garland.


St. Patrick's Day Garland from Kirstikoo

Going for a more natural look?  Try the Shamrock Grapevine Wreath from Mega Crafty or the Lucky Burlap Banner from Lemon Squeezy Home.
 

 Or try joining in the festivities with one of these great tutorials.

Lucky Bunting Wreath from Miss Lovie
Pot o' Gold Party Favor from It Is What It Is


Plaid Cookies from The Decorated Cookie
Shamrock Barrette from Holiday Crafts and Creations

Don't have much time to decorate for St. Patrick's Day?  Try these free printables!


Note that there are a lot of other great tutorials on that last link to The Tomkat Studio! :)

That's all I've got for you on the crafting front for now.  I'll be on a plane to California for a week this Saturday, so I'll craft with you again when I get back.  Enjoy these tutorials and have a happy St. Patrick's Day in the meantime!

Monday, March 7, 2011

If you're wondering...

...why my blog has two headers all of a sudden, so am I.


I go to remove one of them and there's no remove button.  I try and delete all of the information on one of the headers and it says I can't do that.  I used the help feature and it told me to go to settings > Basic > Descriptions and delete everything inside the box.  I did that and I still had two headers.

If anyone has any suggestions, I'd love to hear them.  Until then, I'm sorry for the ghetto-ness.  I'll be busy over here cursing Blogger and threatening to switch back to Wordpress.  It's not too late when you only have 5 followers.

Update #1:  Sources are telling me there's something wrong with my HTML code.  Too bad I don't know anything about HTML.


Update #2:   Hooray!  No more two headers!  Now I can get back to posting about crafting! :)

Unfortunately, though, I'm in the middle of midterms, so no crafting for me for a little bit.  And on Saturday I'm flying to California for a week.  So expect a short hiatus on the crafting front.  My apologies!  But I promise to come back to you with lots of fresh ideas.  I already have some plans brewing so be on standby. :)

Sunday, March 6, 2011

Old Family Photos

For my grandpa's birthday in February, my mom bought him a device that converts his old slides into digital photos.  My mom was working on getting all the slides converted for him today and in the process she emailed me a few of them from when she was a kid.

There were a bunch of pictures from a family vacation they took to Florida in the 1960s.  The vacation was to the same city in Florida where I live now.  The city has really changed, but the ocean looks just the same.


Look how close that tree line is to the ocean, and look how few buildings there are!  Now the coast line is dominated with big hotels and resorts.  But this sure hasn't changed:


The ocean is still as big, blue and awe-inspiring today as it was back in the '60s.

Of course, some things have changed.  This is an actual cloth diaper with safety pins.  I didn't realize what a recent development disposable diapers were!


I spent a lot of time looking over the photos my mom sent me, especially the ones of my grandmother.  My grandmother died when I was very young, so I never got to know her that well.  But I've always felt very fond of her, despite only knowing her in the advanced stages of her Alzheimer's disease.  My mother and grandpa talk about her so lovingly, and I get told often that I remind people of her.

I really liked this picture of her because it looks almost identical to one my mom has of her with my brother when he was a baby.  It would make a statement to have them framed side by side.


And I absolutely adore this photo of my grandma and my great aunt.


They're so deep in conversation they didn't even notice the camera.  It really makes me wonder what they're saying.  And look at those dresses!  Very Anthropologie-esque.  Can we say inspiration?  I think I feel a sewing project coming on...

Mixed in with all these family photos were a lot of pictures of outfits my grandmother had sewn for my mom.  Like this one:


Or this one:


I just love the funny hat on that one.

Seeing the things my grandmother made with her hands made me feel connected to her...and to my own mother.  My mother sewed for me, my grandmother sewed for her and it's a sure bet that you can keep going on down the line like that.  And it made me realize...sewing ties all the women in my family together.

But, before you call me a sexist, it's not the act itself that matters.  For me, sewing is like using your hands to craft a tangible piece of love for someone else.  I don't have my own family yet, but my favorite things to sew are for other people.  It gives me great joy and pleasure to take care of other people with the things that I make.  I am so excited when I'm sewing something for my niece because I know it will make her feel special and it allows me to provide for her, in a way.

Sewing something for someone else is a way to say "I love you"...

I'd been thinking about doing a sewing event for charity since I saw a post on MADE recently.  This realization about what sewing means to me makes me want to do it even more.  Any takers?

And, before I go, my apologies for the lengthy post and the nostalgia.  But maybe it means something to someone else out there, too?  We'll see. :)

P.S. I'm thinking about getting some socks like these...


Just kidding!  See you next time. :)

Tutorial Review: Charlotte dress part 5: the invisible zipper

Remember a few days ago when I almost jumped in front of a bus because I couldn't figure out that invisible zipper tutorial?  Well, today I decided to try a different invisible zipper tutorial to see if it went any better.  The tutorial I decided to use was The Charlotte Dress Part 5: The Invisible Zipper from Craftiness is Not Optional.

Just to clarify, I did not actually make the Charlotte dress.  The only part of this tutorial I'm reviewing is how to insert the invisible zipper, which I inserted into another party skirt because I just loved how the first one turned out.


Okay.  Ready?  Let's check out the zipper.  Here's how my invisible zipper turned out with the Charlotte Dress tutorial:


To compare, here's how my invisible zipper turned out with the tutorial from Clever Nesting:


Much better this time than last, huh?  I was proud.  So let's get on with the review.


Accuracy: 9
Clarity of Directions: 8.5
Helpfulness of Pictures: 8.5
Difficulty:
7
Time: 30 min.
Overall Rating: 8.5
Recommended 

Details:

This tutorial was so, so much easier to understand than the one I tried last week.  To be fair, I had never tried to sew an invisible zipper before last week, so I can't say for sure that the tutorial was as terrible as I felt like it was or if it was just because I'd never sewn one before and had no idea where to even start.  But, on my second try with the Charlotte Dress tutorial, I didn't even have to rip out any seams!  And the zipper is totally invisible.  Hurrah!
The instructions were pretty clear and the pictures illustrated the verbal steps quite well.  The only hairy part (the reason why I took off some points on the clarity of directions and on the helpfulness of pictures) was sewing down the second side of the zipper.  The verbal directions here were a little mucked up, and the picture was cut off at the bottom so that I couldn't see the whole zipper and figure out quite what I was supposed to be doing.  I really didn't want to rip out any seams this time, though, so I pinned the zipper in place and kept trying to zip it up until I got it pinned in the right place.  This actually took three tries, which means if I had have sewn it down before checking maybe I would have hated this tutorial as much as the last one.  Who knows?

So, my tips on invisible zippers, then?  Maybe it's not as much about the tutorial as I think it is.  The key, in my opinion, is trying to zip the zipper once you have the second side pinned before you actually sew it!  That way you can see right away if you have it placed right or not and avoid ripping it out four times and wanting to shoot yourself. :)

Soo...I guess that's all I've got for ya right now.  Happy sewing and see you next time! :)

Saturday, March 5, 2011

Tutorial Review: Dyeing Elastic from MADE

Today I finally got around to dyeing the elastic for my teal polka dot circle skirt.  Instead of using the directions on the dye package (which require a lot of time, effort and water), I used Dana from MADE's tutorial for dyeing elastic.

I chose Royal Blue liquid Rit dye, to match the dark blue polka dots on my teal polka dot fabric.


Halfway through Dana's dying process, my elastic looked like this:


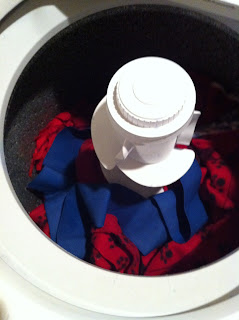
I left the elastic in for an hour and a half, which was as long as it took me to vacuum the living room and clean the bathroom.  Of course, I set a timer and stopped to stir the dye bath every 10 minutes.  Then I rinsed and put the elastic in the wash, like Dana instructed.  Except instead of washing the elastic by itself, I washed it with dog and cat blankets that needed to be washed so I didn't waste water.  I didn't care if the blankets turned blue since their only purpose is for the dog and cat to lay on so that fur doesn't get all over my couch and chairs.


When I put the elastic in the washing machine, it was a brilliant blue and I was pretty pleased.  Dana warned that the dye would wash out a bit and look a little lighter once washed, but I was quite disappointed when I got my elastic out of the dryer and saw just how much it had faded.  It looks like this:


It wasn't streaky at all before the washing, but afterward it was.  And the color was like 10 shades paler than before it went through the wash.  I guess the dye rinsed out a LOT and quite unevenly, I'd say.  There were still stretches of the elastic that looked okay and I can still use them, but the color doesn't match the fabric I had intended to use it with.  I guess I'll have to dye it again.


All in all, I was just disappointed in the way it turned out, but that shouldn't reflect on the tutorial.  Here's what I think of the tutorial.

Accuracy: 10
Clarity of Directions: 9
Helpfulness of Pictures: 10
Difficulty: 1
Overall Rating: 9
Time: ~2 hours, including washing

Details:
Now, even though my elastic didn't turn out how I'd hoped it would, I don't blame it on the tutorial.  It's probably because I chose such a dark shade or maybe because I didn't stir enough.  It might even be something about washing it with some other things when I was going through the rinse process.  Basically what I'm saying is I don't think it's the tutorial's fault at all.

The directions in the tutorial were really simple to follow.  The pictures were really helpful and the tutorial even linked to another tutorial about dyeing fabric in general that helped me out a lot, too.  The only thing I wasn't clear on was how much water to use.  Neither the fabric dyeing nor the elastic dyeing tutorials specified how much water to use with the dye mix.  I used the dye package to figure this out.

Overall, I'd say it was a great tutorial.  So, why aren't I recommending it, you ask?  Because I'm not convinced doing it this way is better than the way the dye manufacturer suggests.  So, before I recommend this tutorial, I'm going to give the dye another shot with the instructions from the package and tell you which turns out better.  So stay tuned!

Friday, March 4, 2011

Tutorial: St. Patrick's Day Shamrock Flag

Hello sewing world!  The other day when I made my St. Patrick's Day garland, I had leftover fabric and whipped up something for my door, because, let's face it, it's just too soon to put up the Easter egg wreath.

The wind was blowing a LOT the day I took this.  Sorry it's crooked!
And I thought you might like one, too.    So are you ready for another exciting new tutorial?!  Okay, let's get started. :)  Follow me after the break to learn how to make your own St. Patrick's Day Flag! :)


Thursday, March 3, 2011

Tutorial Review: St. Patrick's Day Garland from Kirstikoo

I had some free time this afternoon and decided to do some quick home decor crafts.  If you're like me, you're probably ready to get down those Valentine's Day decorations and get something up for March.  So I hit Google and found this really cute St. Patrick's Day Garland tutorial over at Kirstikoo.  This is what I came up with:

The tutorial made a pretty long strand of garland.
And I just love the way the cute little buttons look on the end.


So, surprise surprise, today we'll be taking a look at the St. Patrick's Day Garland tutorial from Kirstikoo.  I'm really whipping out these tutorial reviews this week, aren't I?  Anyway, here we go!


Accuracy: 10
Clarity of Directions: 10
Helpfulness of Pictures: 10
Difficulty:
1
Time: ~1 hour
Overall Rating: 10
Recommended 

Details:

So this review almost seems a little unfair after the last two reviews I wrote.  But, really, there weren't a whole lot of ways you could go wrong with this tutorial!  I mean, garlands are kind of self-explanatory.  And this one was super simple.

Like the tutorial said, the most time consuming part was cutting out all the felt clovers.  That's where I spent 90% of my time.  The rest was just sewing in a straight line and putting on the buttons!  Simple, simple, simple.  There were lots of good pictures and the directions were well-written if you're a "green" sewer and need to be walked through it.  (Ha-ha-ha...I'm so punny!)

 I do have one important note about the tutorial, though.  The tutorial provided a shamrock template for cutting out all your little clovers.  It was supposed to open in Google Reader, but when I opened it I got a "Server Failed" page.  No worries, though.  Just type "shamrock line drawing" into Google and click on images.  I found this one, saved it and resized it to my liking.  (As a sidenote, that website might be good for seasonal projects later.  Lots of line drawings of holiday things!)


Clearly, this tutorial gets my recommendation.  Simple, quick and a definite home sprucer-upper for March. :)  

Tutorial Review: Invisible Zipper Tutorial from Clever Nesting

This post will be a review of the Invisible Zipper Tutorial from Clever Nesting.  This tutorial was used as a sub-tutorial of the Party Skirt Tutorial from Creative Spaces.  So if you wanted to make that skirt, you might be interested to see how this tutorial worked out.


Accuracy: ?
Clarity of Directions: 2
Helpfulness of Pictures: 2
Difficulty: 9
Overall Rating: 2

Details:

First and main thing I have to say about this tutorial?  The pictures were really, really bad.  They weren't big enough to see.  You couldn't click to enlarge.  And, I mean, what is this?


What sucked about the pictures sucking is that placement on an invisible zipper is really important in order to get it to come out right.  At different points, I couldn't tell if the zipper was facing upward or downward or if the zipper's teeth were facing inward or outward.
While trying to complete this tutorial, I ended up ripping out my zipper four separate times, crying and threatening to throw my sewing machine out the window.  I had to step away from the project for about an hour just to calm down enough to continue after the fourth round with the seam ripper.

So how did I eventually get an invisible zipper in my pink party skirt, you ask?  Well, I consulted the directions on the zipper's packaging (failed), googled it (failed) and ultimately called my mom (love her!).  I would not recommend this tutorial to you unless maybe you like making yourself cry.

Of course, to be fair, maybe I just couldn't figure it out because I'm really new at sewing.  So, if you want to give it a try and let me know if my review is fair, feel free to do it.  And shoot me an email if you think I'm wrong!  :)  mseaber (at) gmail (dot) com.  

So if you just have to have an invisible zipper tutorial, and I can't recommend this one to you, here's what I suggest you try.  Over at Craftiness is Not Optional (a sewing blog I frequent), the author Jess recently did a sew along for the Charlotte Dress.  In part five, she inserts an invisible zipper.  You might want to give that one a try, although I haven't tried it myself yet.

P.S. If you're wondering why there's a question mark for the accuracy rating on this tutorial, it's because I couldn't understand what was going on enough in the tutorial to tell if it was accurate or not.  Feel free to take from that what you want and assign your own rating.

Wednesday, March 2, 2011

Tutorial Review: Party Skirt from Creative Spaces

It's that time again!  Today I'll be reviewing the Party Skirt tutorial from Creative Spaces


This will kind of be a two-step process because instead of writing her own steps for the invisible zipper, the writer at Creative Spaces links you to another tutorial.  I'll review that in a separate post a bit later.  If you didn't get a chance to read my previous post, my party skirt ended up looking like this:


Pretty darn good, huh?  Okay, so I'm still really proud of this one.  But let's get on to the review!


Accuracy:  10
Clarity of Directions:  7
Helpfulness of Pictures:  7
Difficulty:  6.5
Overall Rating: 8.5
Recommended

Details:

First of all, let me just say I would recommend this tutorial to anyone simply because I love, love, love the way my skirt turned out!  But before I got to that point, here's what I experienced.

I read through this tutorial two times before ever getting out my fabric or sewing machine, and I still had some difficulty understanding the directions.  The steps didn't appear to be separated by paragraph or any logical fashion.  Instead, they all sort of ran together.  Maybe it's just me, but if you choose to try this one out, be sure you read through it at least once before starting to avoid making mistakes.  But that's generally a good idea, anyway. :)

As far as the pictures go, they pictures weren't bad pictures, but they didn't always seem to represent the steps which the author was discussing at the time.  In addition, there didn't seem to be a picture for each step.  Luckily in this tutorial it wasn't as necessary to have a picture for each step, so it didn't affect me too much.

Those things aside, though, I loved how easy it was to create my own pattern.  I don't think it could be made any easier than doubling your waist measurement!  Bravo on that, Creative Spaces.  

And did I mention the skirt is absolutely adorable?  This tutorial gets my recommendation!  It was really easy and fun to sew, and the only reason you might consider not doing it is if you're a very new sewer and think you might not be able to conquer that invisible zipper.  So, go on and give it a try if you wanna! :)

P.S. Review of the invisible zipper tutorial is coming tomorrow, so check back if you want the whole picture.

Tuesday, March 1, 2011

New Tutorial Review Process

As I mentioned in my status update earlier, I'll now be doing tutorial reviews a little differently.  Instead of just giving you a rundown of what the tutorial was like and either recommending it or not, I'm now going to rate the tutorial on different criteria and then give a final rating and/or reccommendation. So let's talk about the categories.

1.  Accuracy.  The accuracy rating will be based on whether or not the directions and/or pattern in the tutorial are correct and flawless.  Believe it or not, I've encountered tutorials in which the pattern wasn't the correct size or in where the tutorial had been changed but a previous step hadn't been removed, etc.  An accurate tutorial will recieve a rating of 10; an inaccurate tutorial will recieve a rating of 1.


2.  Clarity of Directions.  This rating will be based on how helpful the written instructions in the tutorial are.  If the tutorial's wording is clear, precise, brief and easy to understand the Clarity rating will be a 10; if the tutorial's wording is incomprehensible the clarity rating will be 1.


3.  Helpfulness of Pictures.  When someone isn't there to explain to you how to do something, pictures are probably the next best thing.  The pictures in a tutorial are very crucial to your understanding of the directions.  I'll base my rating for a tutorials' pictures on the following questions:

  • Is the photo of good quality?
  • Does the photo coincide with the written step?
  • Is the picture big enough to see clearly?
  • If the picture is not big enough to see clearly, can it be enlarged?
If the answer is yes to all of these questions, the tutorial's picture rating will be a 10; if the answer is no to all of these questions, the tutorial's picture rating will be a 1.


4.  Difficulty. This rating does not necessarily reflect on the quality of the tutorial.  Instead, it serves as a gauge for sewers of whether the project is achievable for their personal skill level.  A very difficult project will receive a rate of a 10; a very easy project will receive a rate of a 1.


5.  Overall Rating.  This rating is just what it sounds like.  On a whole, how good is the tutorial?  A superb tutorial will be rated 10; an abysmal tutorial will be rated 1.  Most tutorials will probably fall somewhere in between.  If I recommend the tutorial, I will say so here.


So now that you have the low down you'll be prepared for my next posts...the party skirt tutorial review and the invisible zipper tutorial review! Keep your eye out!
Related Posts Plugin for WordPress, Blogger...