


Click on "read more" to get the scoop on the tutorial.

Accuracy: 10
Clarity of Directions: 10
Helpfulness of Pictures: 10
Difficulty: 1
Overall Rating: 10
Helpfulness of Pictures: 10
Difficulty: 1
Overall Rating: 10
Time: ~10 min. / flower
Recommended
Details:
Happy Together's Loopy Flower tutorial was marvelously simple and I can think of so many things you could do with the finished product, from garlands and notions to hair accessories and gift wrapping. It was quick and simple, which means it would be no problem to throw one of these together as a finishing touch on another sewing project or as a last-minute gift (or gift wrap!) for someone special. How versatile!
I read through the tutorial once and then went to town on my scrap fabric. I went from this...
 |
| Why, yes. My cat is burrowing in my scrap pile in this picture. What of it? |
I did make a mistake on the first loopy flower I made, but that can't be blamed on the tutorial. (I cut on the selvage instead of the folded edge, but the directions clearly state otherwise.)
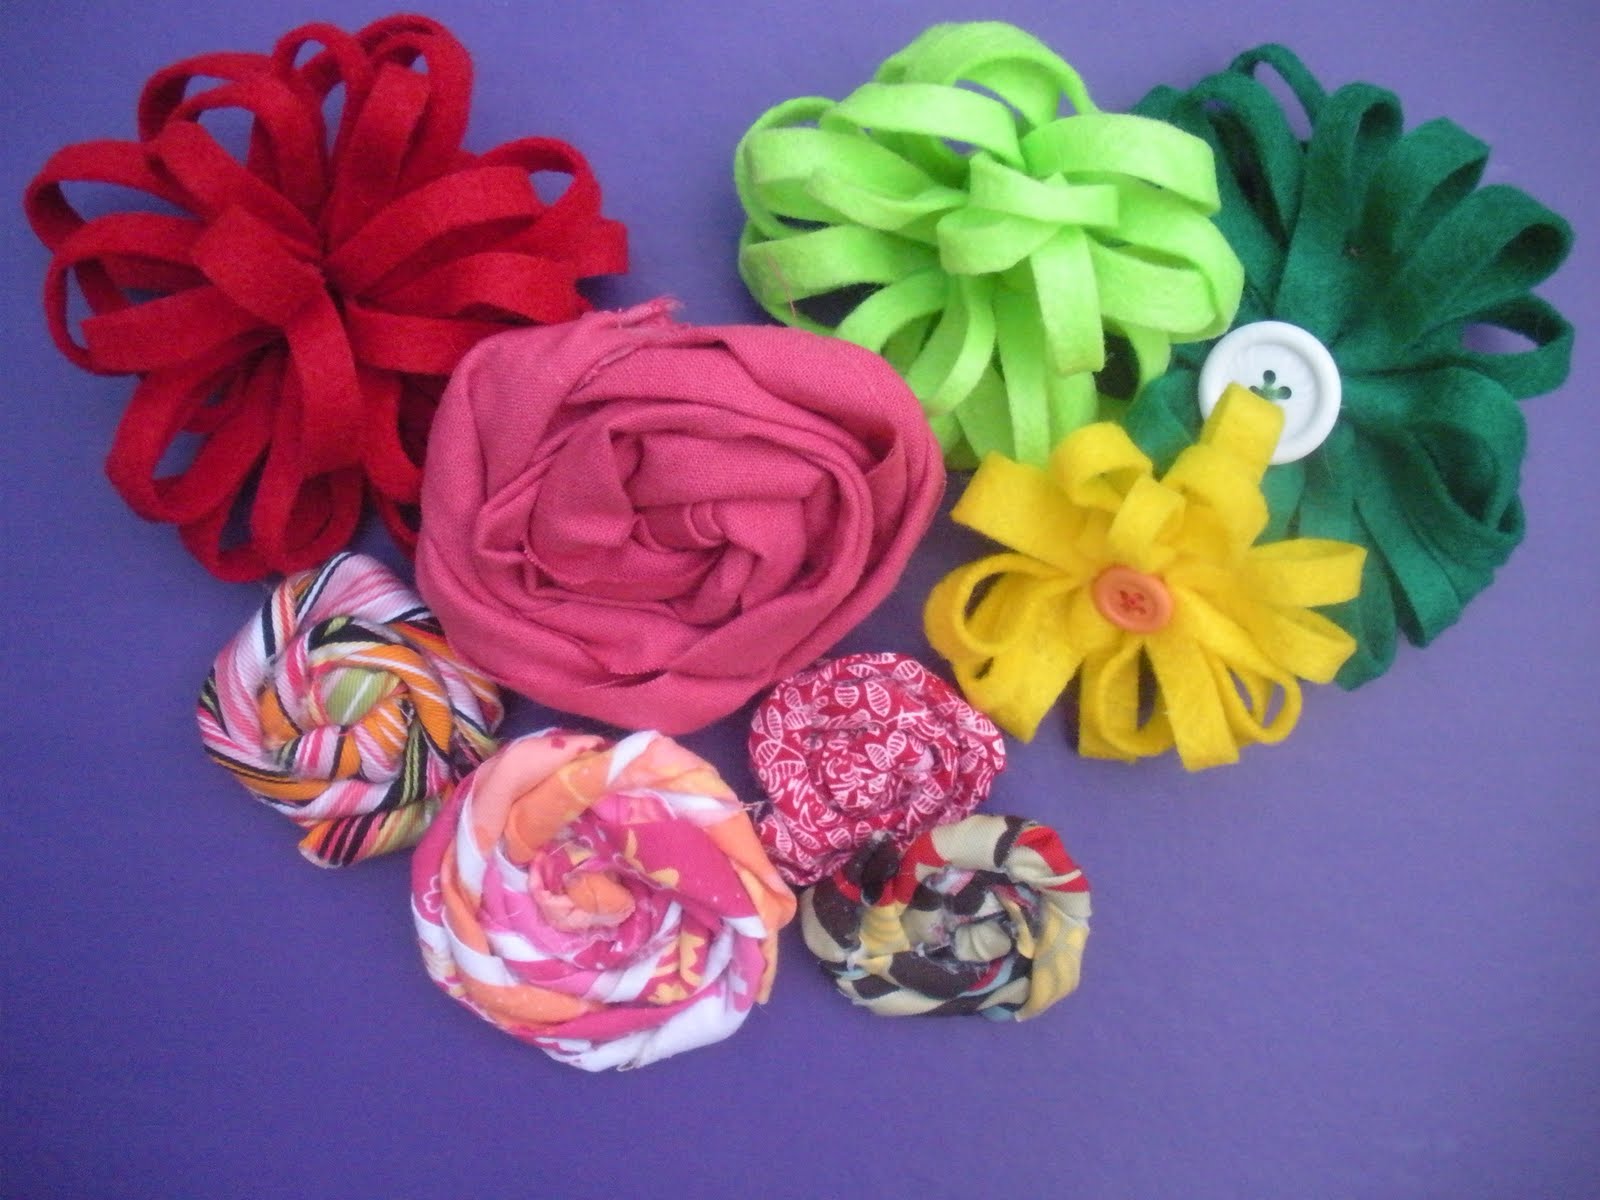
There were two ways to finish this flower. You could hand-stitch down the uncut edge and then sew a button on, like this:

Or you could roll it up and sew it together, like this:

I much preferred and recommend the rolling version (instead of the button). While the button is cute, I could never get the flower to lay quite right with that method. I had much better luck with the rolling and I liked the fullness of the flower with that method. However, depending on your project the button version may be appropriate. The button version did glue better to hair clips, so I guess it all depends on what you're doing.
One last tip I have with this tutorial: use a big rectangle for the rolled version and a littler rectangle for the button version. The bigger the rectangle the better luck I had with the rolled version, but the opposite was true with the button version. It seemed to lay flatter when the rectangle I started with was a little smaller.
The verdict? Tutorial recommended, so get crafting! :)
0 comments:
Post a Comment
Your comments brighten my day, so comment away! (Hey, that rhymes!) As always, thanks for reading. :)